
Kindle Cover {Tutorial}

As promised, here is my Kindle Cover tutorial {sorry for the delay…we had some friends come visit, and I didn’t coordinate my time before their arrival very well – but we had a blast!}.
Supplies:
1 Charm pack or assorted scraps {for outside}
5/8 yard print
Velcro
Elastic {choose a color to match the reader, not the cover – I used black}
Buckle {optional}
First, measure your reader, my Kindle Fire measures 7 1/2″ x 4 1/2″. To determine the measurement, double the width and then add 2 1/4″ {note, the Kindle Fire that I have measure about 1/2″ thick. If your reader is flat or nearly flat, remove 1/2″ from the width. For the height, add 3/4″. So, the finished measurement for the Kindle Fire cover is 11 1/4″ x 8 1/4″.
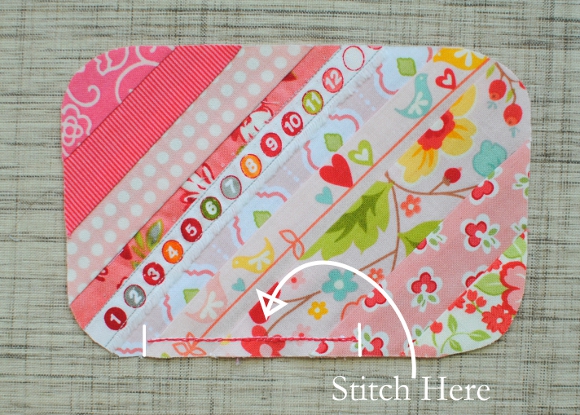
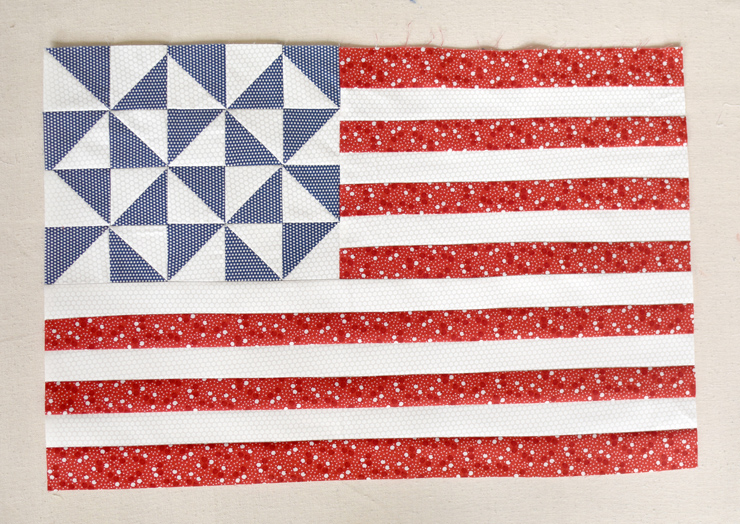
Arrange your fabric as desired for the outside. For the cover on the top I used half hexagons. For the cover on the bottom I used blocks from The Farmer’s Wife Sampler Quilt book.

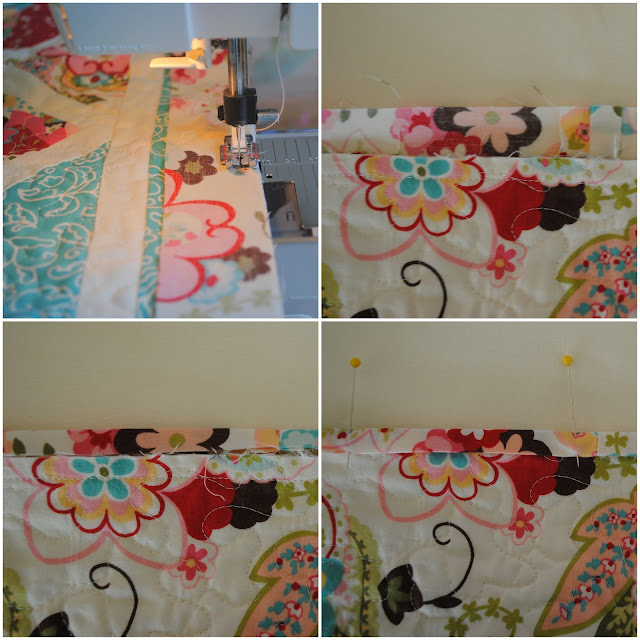
After piecing the outside {I am hoping to make a few more of these, so I’ll update with other ideas!}, layer with batting and quilt to a piece of fabric. Next, cut to pieces of fabric 1/4″ narrower than the cover, fold these in half to make the pockets for the inside of the cover. There should be a gap between the pieces, as shown:

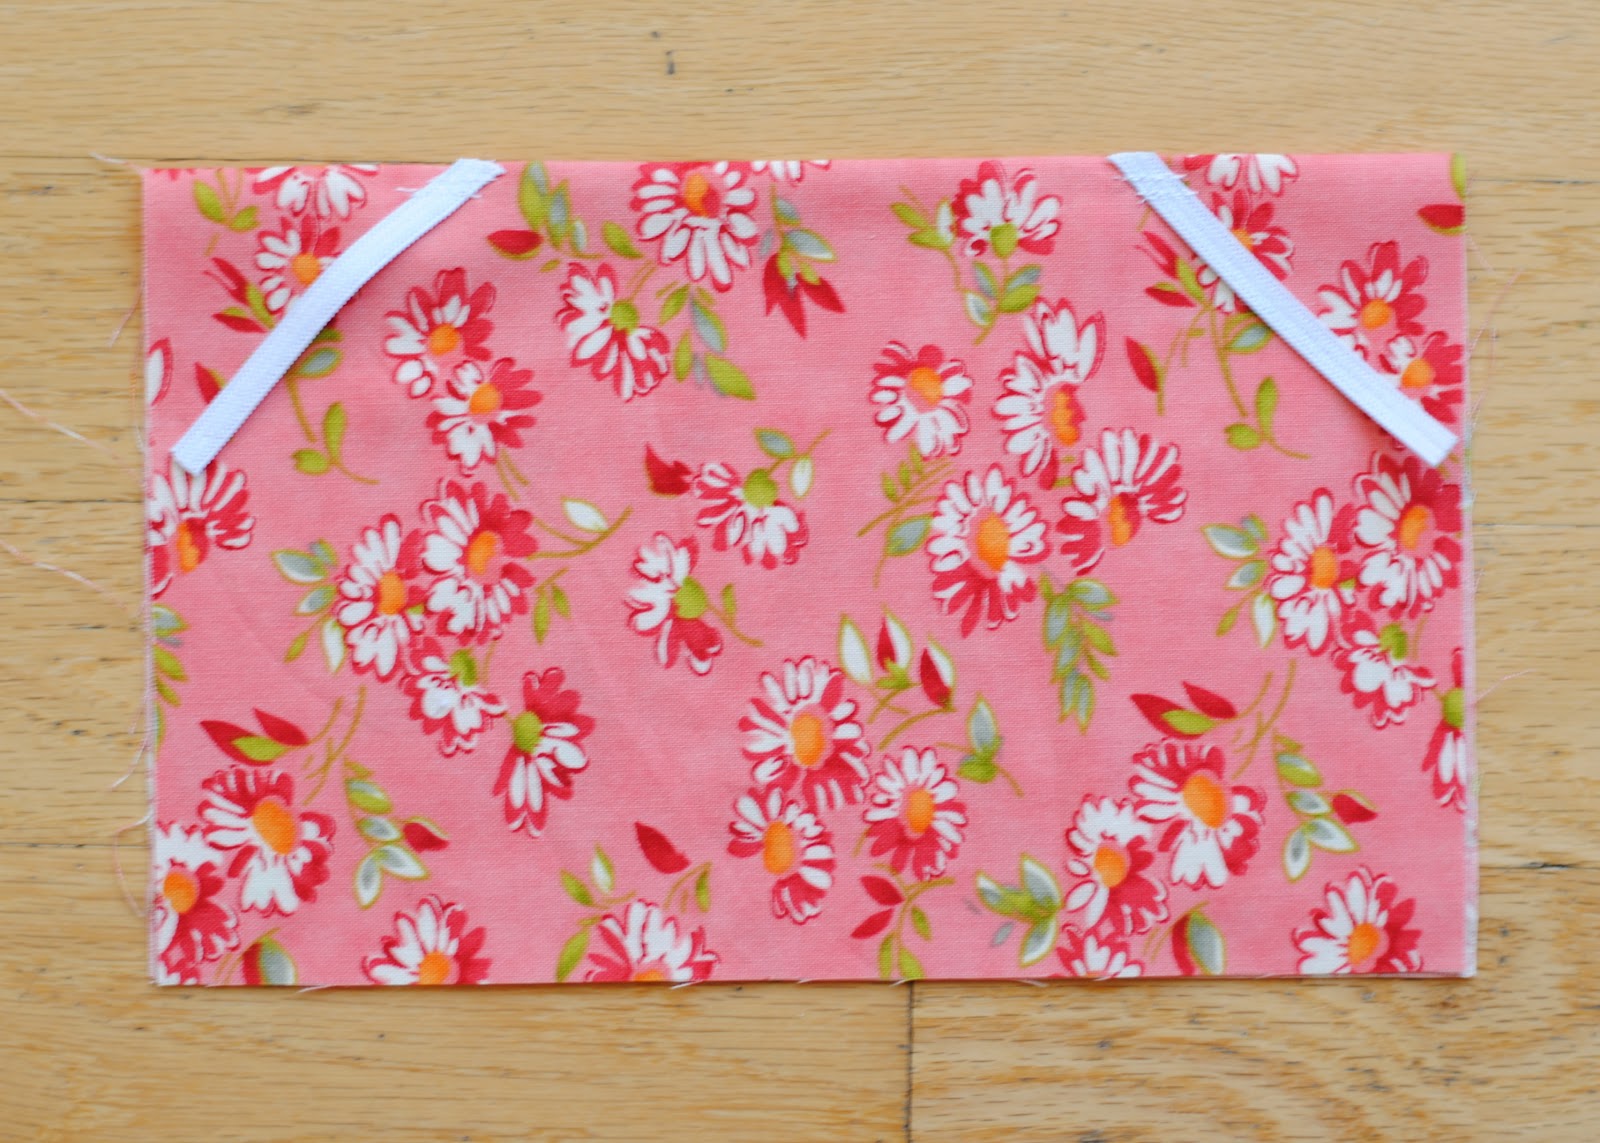
Along the folded side of the left pocket, stitch the elastic in place separate from the outside of the cover. Stitch 1/8″ and 1/4″ from the edge {by stitching in two places, the pocket does not curl up when the Kindle is placed in the cover}, as shown:
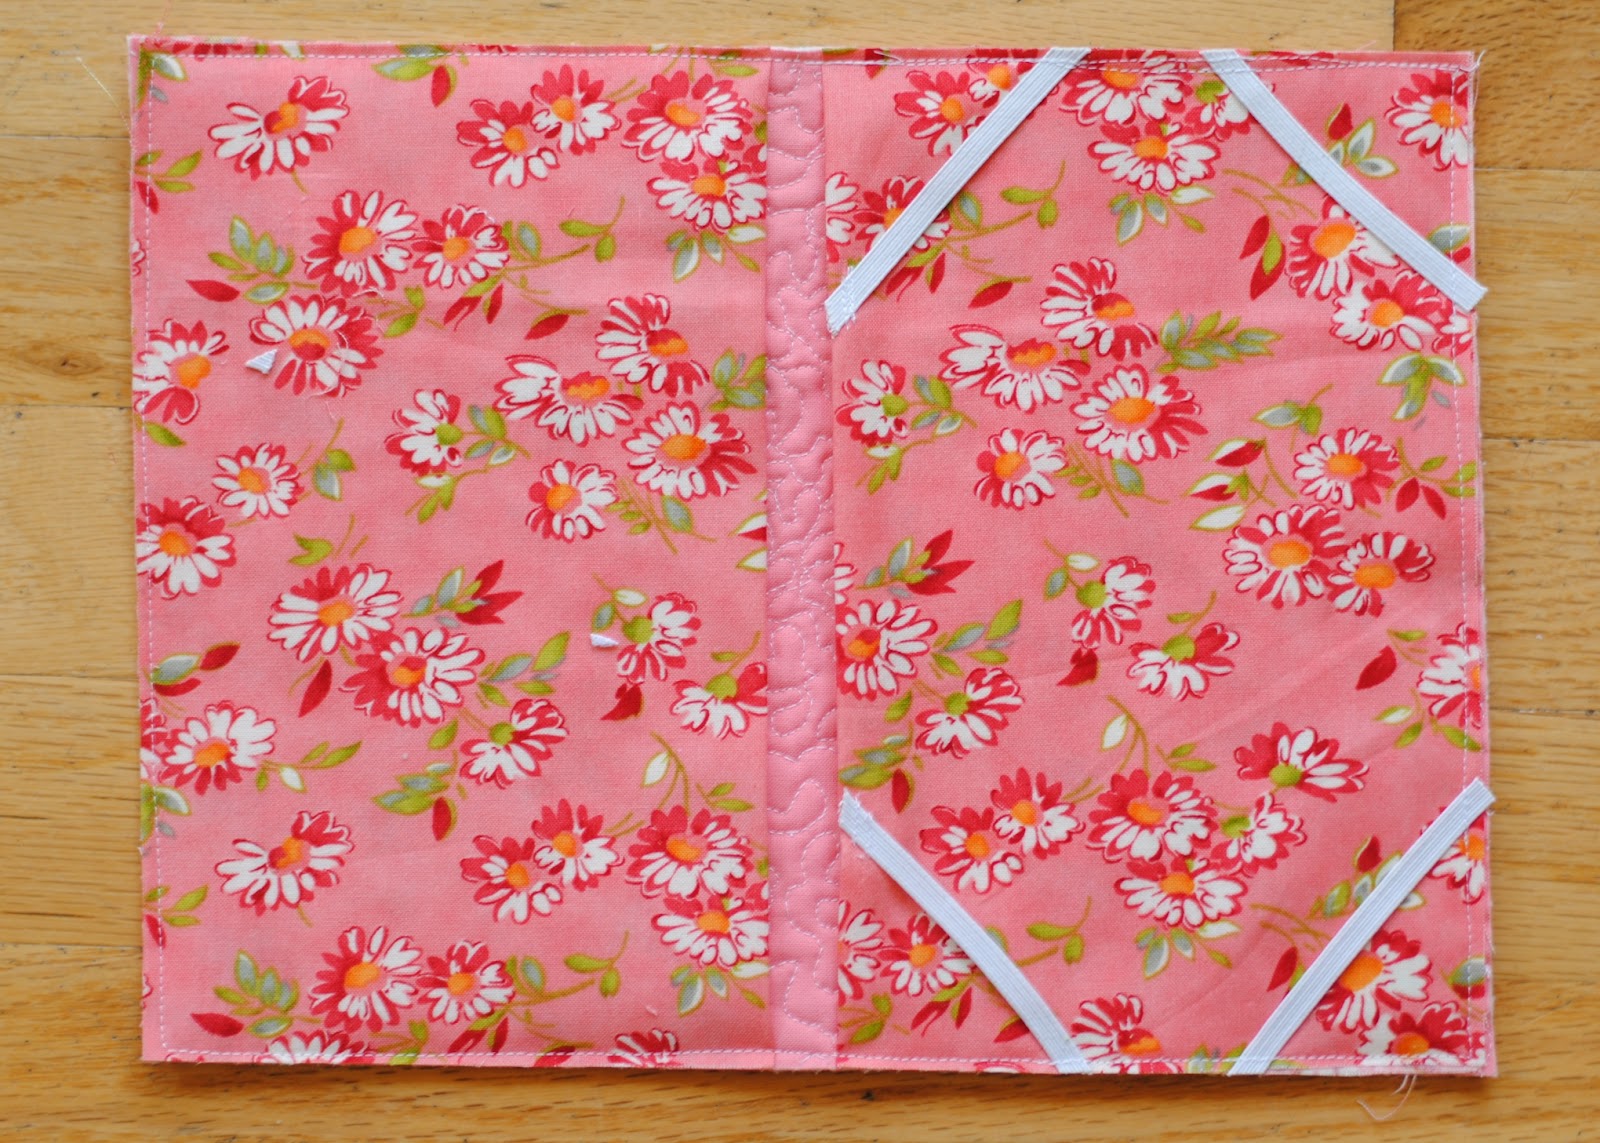
Stitch the loop side of the Velcro closure to the front of the cover. Then, place both pockets on the wrong side of the cover and stitch 1/8″ from edge of cover outside to keep pockets in place. Then, attach the other sides of the two elastics, plus the remaining two elastics in the corners, as shown:
Next, make the closure as you desire. Here are the two methods I used, the buckle{honestly, I didn’t write down the dimensions because it will vary for any buckle!}:
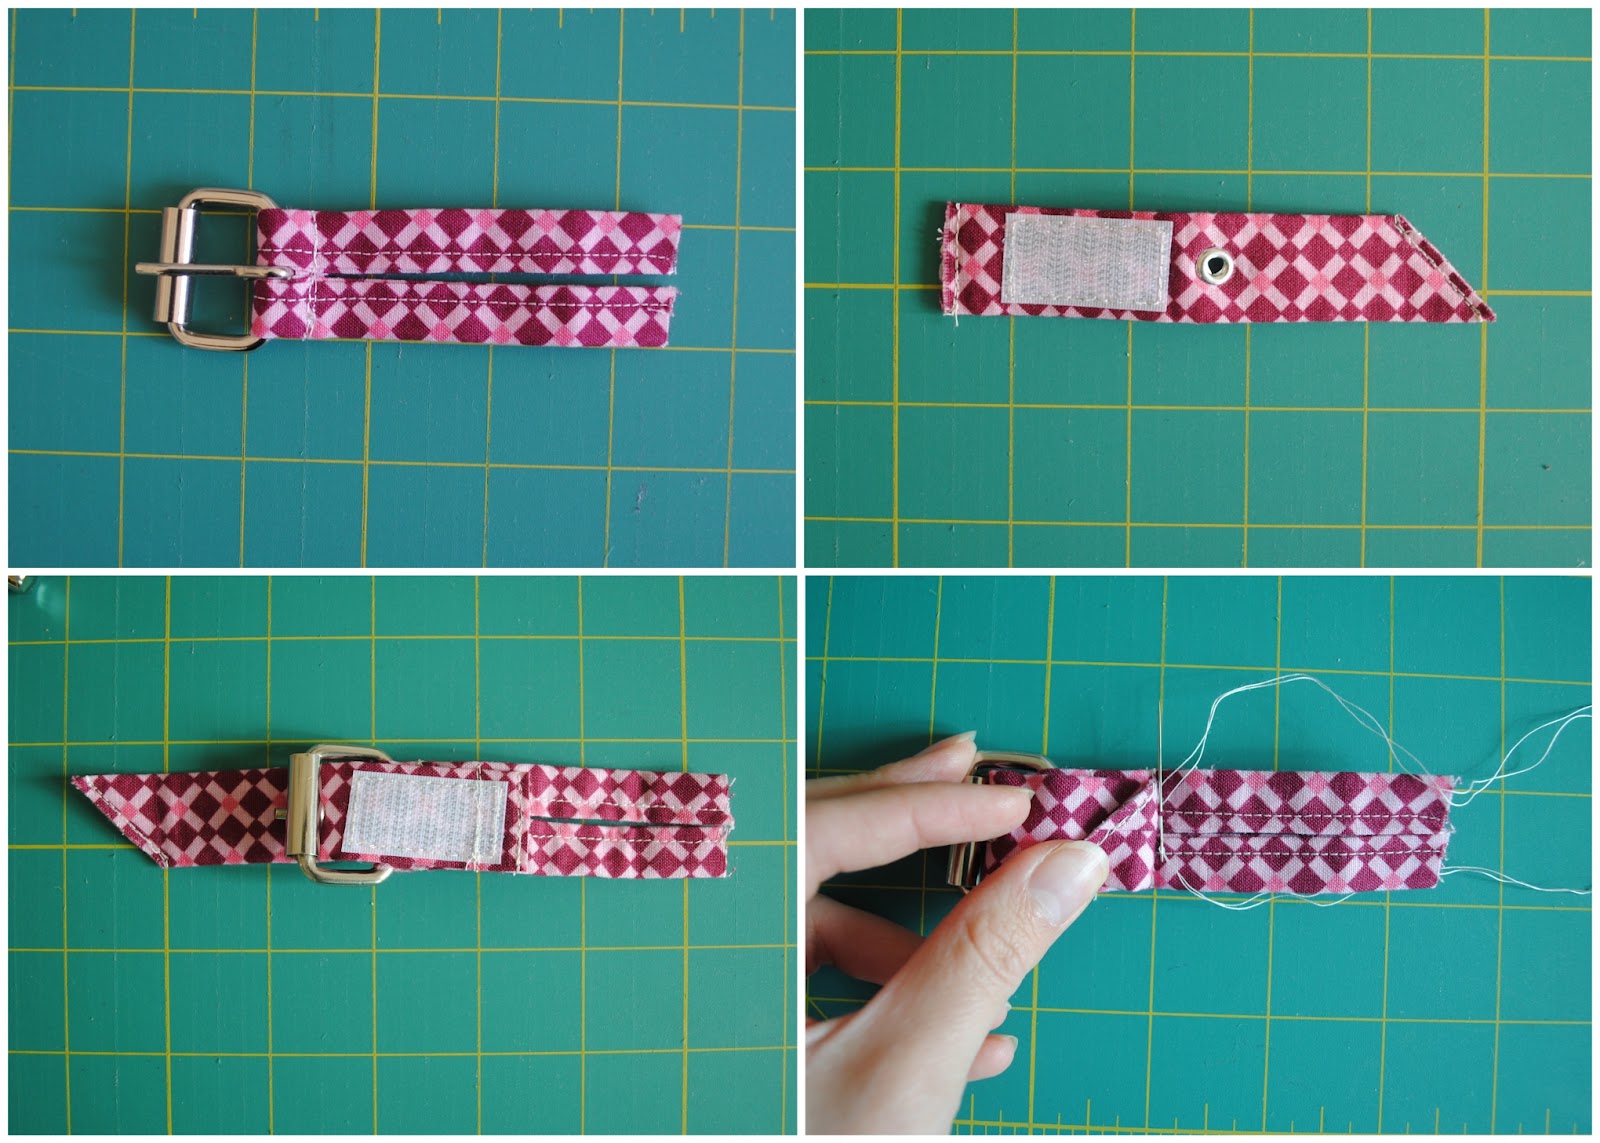
and the flap {my flap is 2 1/4″ wide before seam allowances}:

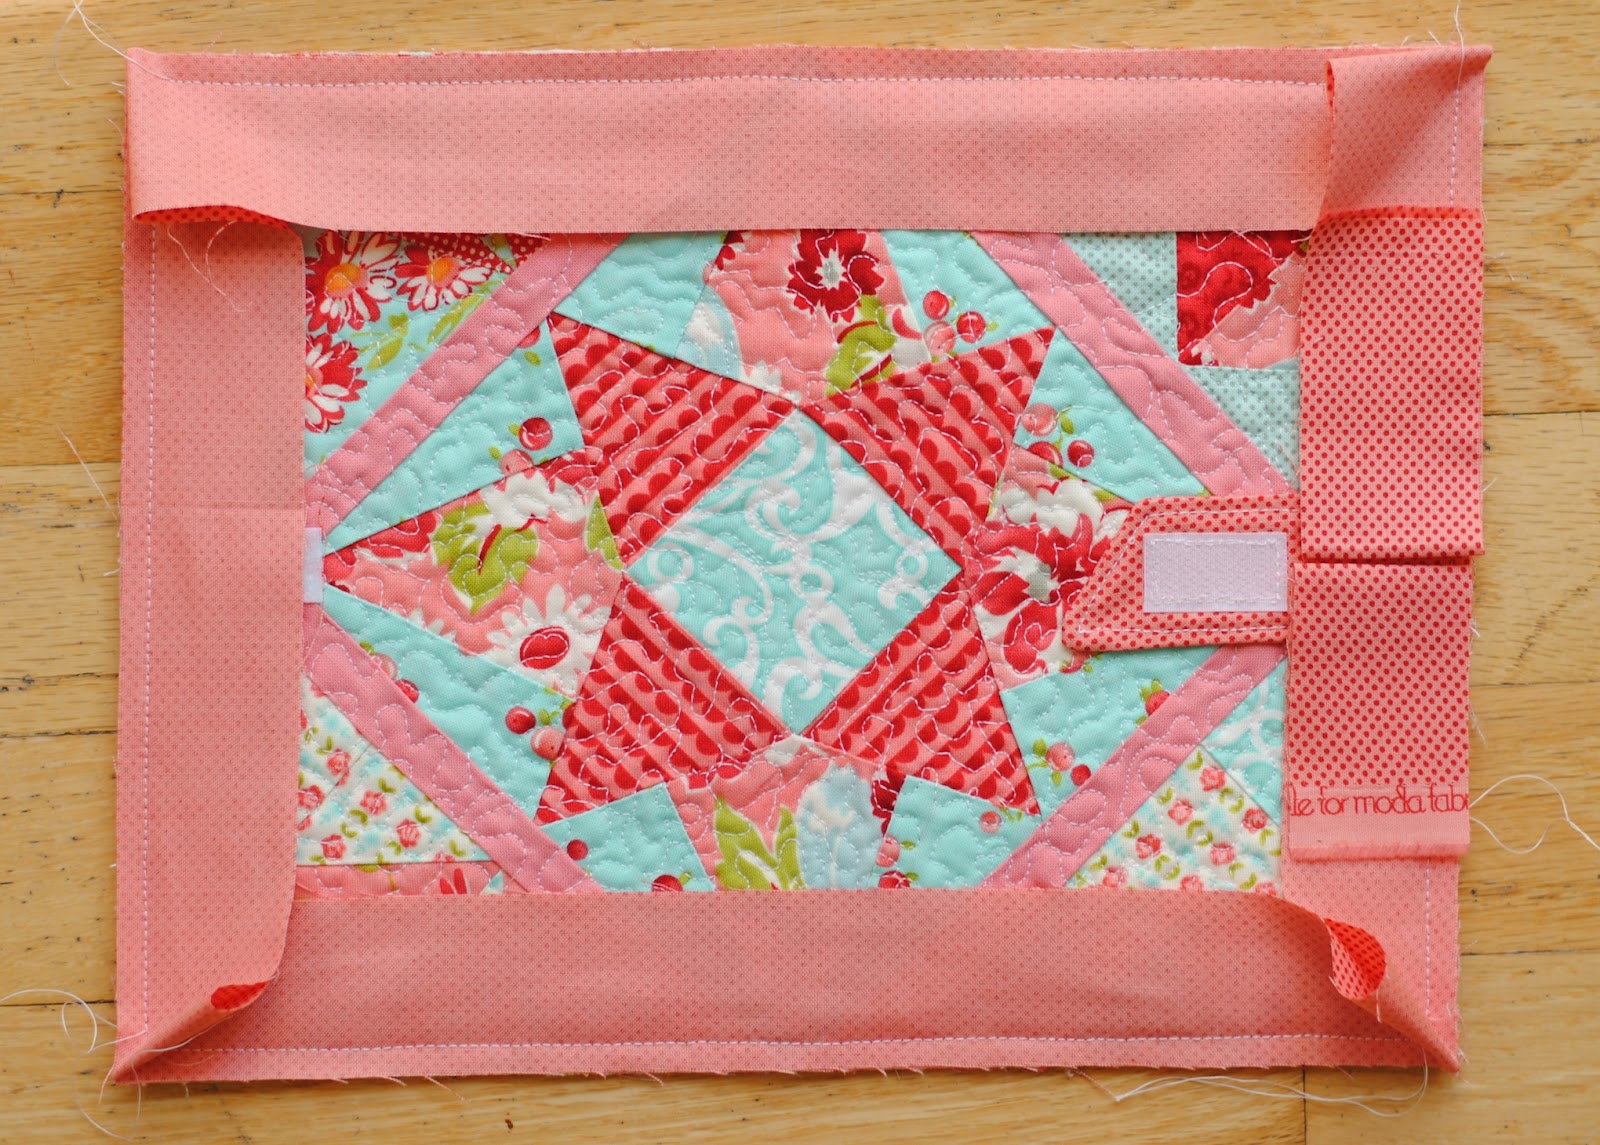
Sew your closure to the outside of the cover before sewing the binding, like this:

Then, cut one 1 1/2″ x WOF strip for the binding. I’m going to use a single fold binding method. The construction is similar to the traditional double fold {see my binding tutorial}. Sew the binding to the outside of the cover:
Then finish the binding like this:
I had originally machine finished my binding on the Farmer’s Wife Kindle Cover, but since I decided to change the white elastics out for black, I was happier with the hand stitching on the Hexagon Kindle Cover, so I hand stitched the binding back down, here’s the before:

And the after:
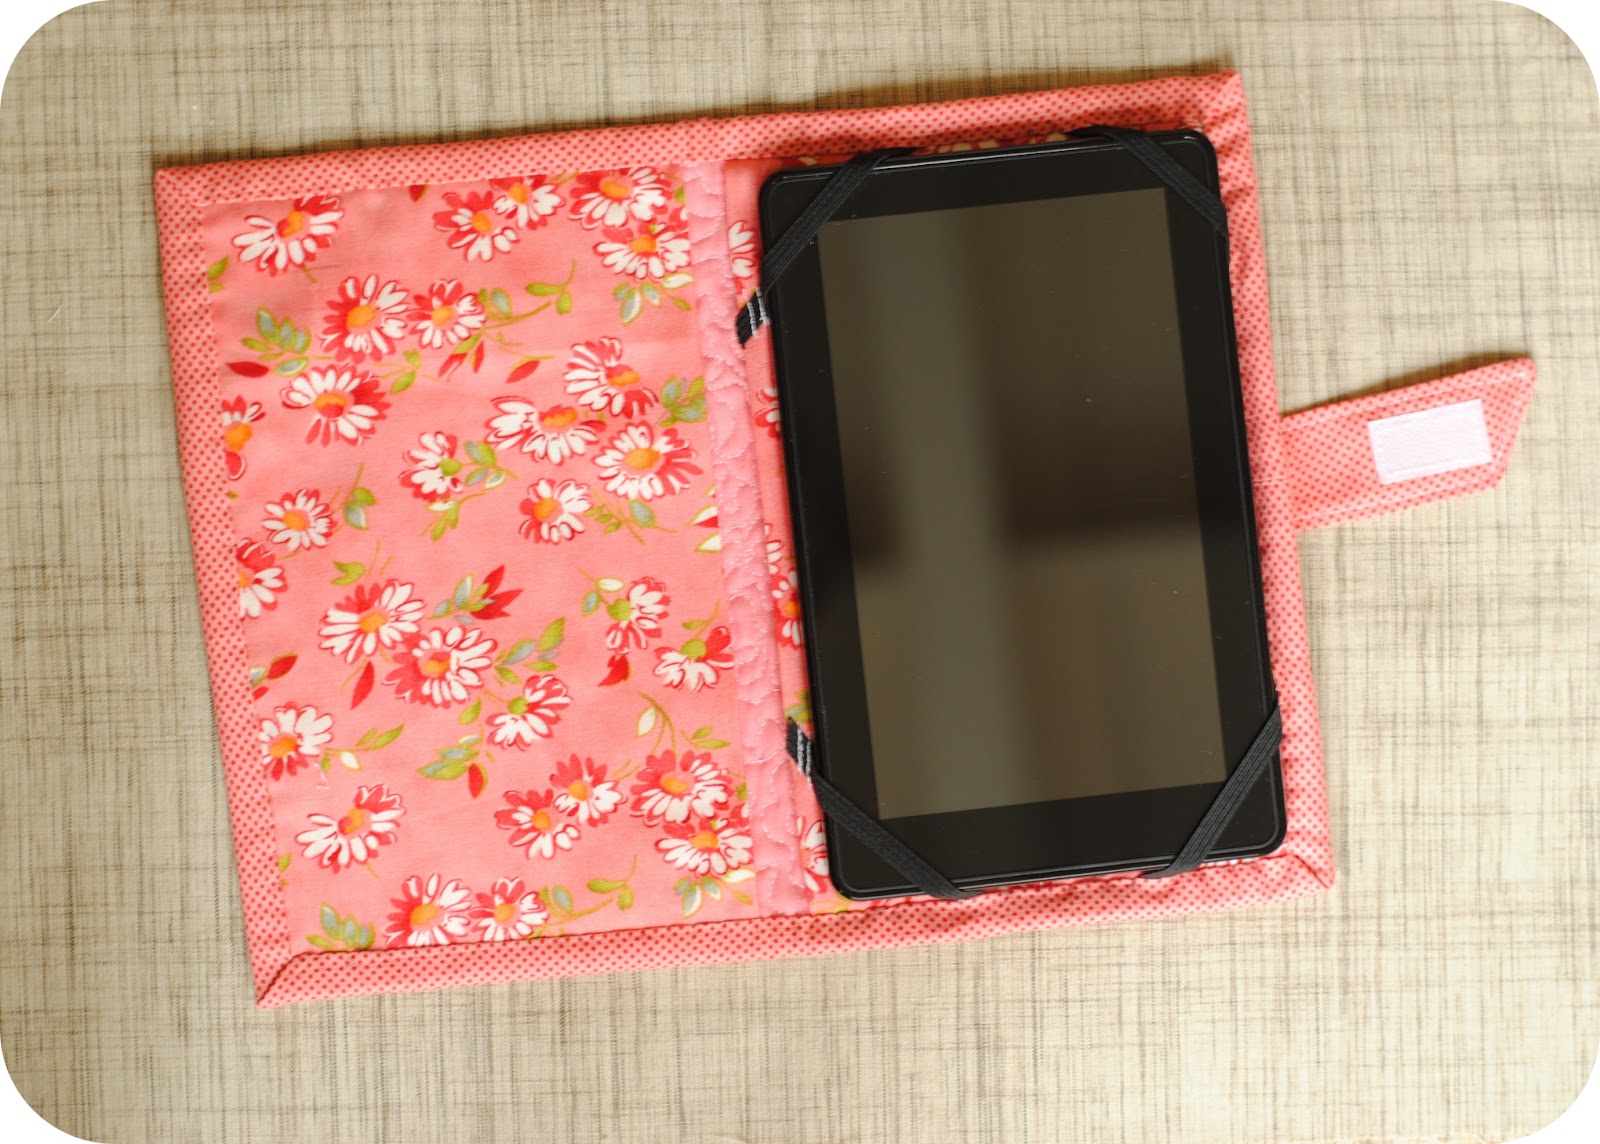
I think it is much improved! Then, I just cut a piece of plastic canvas and slip it in one {or both} of the pockets to give it a nice sturdy shape!
And, if you make a cover using this tutorial, I’d love to see it! Please post it to our Flickr group!


Jennie, is there anything you can’t do? You have such a talent and I so enjoy seeing your creations. Beautiful quilted covers and wonderful tutorials.
So pretty and functional! Your tutorial is great. I always get myself all confused when thinking about the inside-out stuff. Half the time I get it wrong and have to redo it!
Wonderful tutorial….thanks!!
Very cute Jenni! Thanks for the tutorial.
thanks for this great tutorial…^^
Wow! I really like your Domestic Bliss one!!
Brilliant tutorials! And I love the covers, they are so pretty and colourful!
Helen x
great tutorial!
Will you be selling these on Etsy? Love your tutorial, and I do sew, but an Etsy purchase would be so nice.
Hi there, I don’t think I’ll be making any for the Etsy shop, if you’re interested in a custom order, e-mail me and I may be able to help you out!
I don’t have the Farmer’s Wife Sampler book (yet?). I love the kindler cover in the melon color. Can you tell me the name of the block>
If you look back to my Farmer’s Wife in Your Life post here, you will find the names of all five blocks I used for the melon color Kindle cover.
Ok, I’m going to try and make one today!! I’M not good at following directions. I’m a little confused when you talk about sewing the elastic strips on because in one picture you have the pocket folded and then I think it’s turned another way in the other picture. I get so confused but I’ll just jump in and figure it out as I go. I’m a beginner at projects like this which is a long way from sewing a straight line.
Gmama Jane
Very cute! Will make one but will scale it to fit my tab (when hubs gets it for me! ;)). Was wondering if interfacing (strong ones) will make it sturdy?
I think a nice strong interfacing would make it sturdy. I just like to use the canvas because it can be easily removed and I know how it washes up. With little kids, all my fabric stuff ends up being washed!
This is a great project. I am to the point of sewing on the elastic. I am making this for someone else and do not have the Kindle Fire here. I am uncertain about how far down the side to place the elastic so that it fits over the corner and not in the screen area. I think it is about 1 1/4 inches. Does that seem about right?
The elastics are actually about 2″ down the sides {if you include the part that is under the binding} and 1 3/4″ from the bottom corners {also counting the portion under the binding}. I hope this helps. I could not e-mail a reply to your comment because there is no e-mail address in your profile.
Great Idea , congratulations.
http://tearpiaocupacional.blogspot.com.br/
Love this tutorial! I made one for a Kindle Touch and I added a pocket to the left and a slot for the light that M-Edge makes to the right. It was for my brother’s girlfriend’s graduation, but I may make one for myself now.
do you know, will this fit a Nook?
thanks julie
Oh my goodness, I absolutely love these. I have a Nook, and just recently purchased a leather cover with a little stand attached so I can stand the Nook up on the table while reading if I want. I almost wish I didn’t have it because I love these so much! Good for you for making such a wonderful, useful, beautiful item. And thanks for sharing!
Hugs,
Julie
I really wish I had a sewing machine 🙁 can’t wait to get one- this will be a project i save to my pintrest!
Just a note to let you know I referenced this blog post in my post about Christmas sewing! Thanks for the tutoria and cute Kindle coversl! You can see my blog post at http://agirlsgottalive.blogspot.com/2012/12/christmas-sewing-projects.html
Very nice, thanks for a great tutorial.
Many thanks for this tutorial. I followed it to make a cover for my kindle, and I’m really pleased with the results. I blogged it briefly at http://www.martiandaze.net/blog/2013/3/23/woooosh.html. I really appreciate your clear instructions and the time it must have taken to put together.
this is a great tutorial! thanks for sharing. love the use of a lost ufo quilt block.
I received a Kindle for Mother’s Day and I can’t wait to make one of these. I will love my Kindle even more.
Hi there, I just posted a blog post on using your Kindle cover blended with another blogger’s cover to make a hybrid cover for my new Kindle 8.9″. I didn’t give any of your measurements and made sure to link back to you and the other blogger so I hope that’s ok. Thanks for a great tutorial. I can’t wait to browse more of your stuff (on my new tablet, of course!) You can see the post here http://bethstrand.wordpress.com/2013/07/28/one-hybrid-kindle-cover-aka-why-i-baste-things-and-keep-my-seam-ripper-handy/
Gracias, por este gran tutorial, hice un cubierta para la tablet de mi marido y quedaron todos encantados, y ahora mi nieto Santiago me pidió una para él, en cuanto tenga un momento subo las fotos. Gracias!!!!!!!!!!!!!!!1
Thanks for the great tutorial!
great tutorial! i made a harry potter themed one : )
oops not sure how that last link ended up there!
I really love this. I’m going to make it immediately. Thanks.