
Add a Divider to Emmaline Bags’ Retreat Bag {Tutorial}
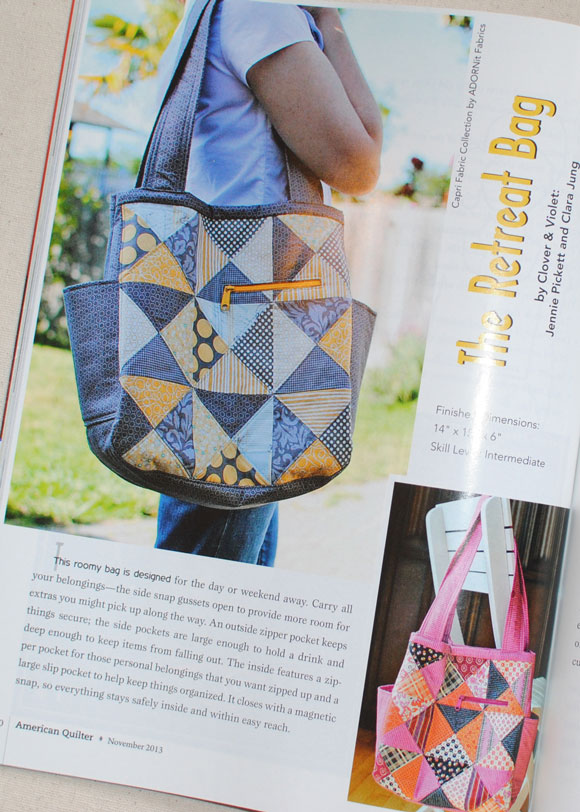
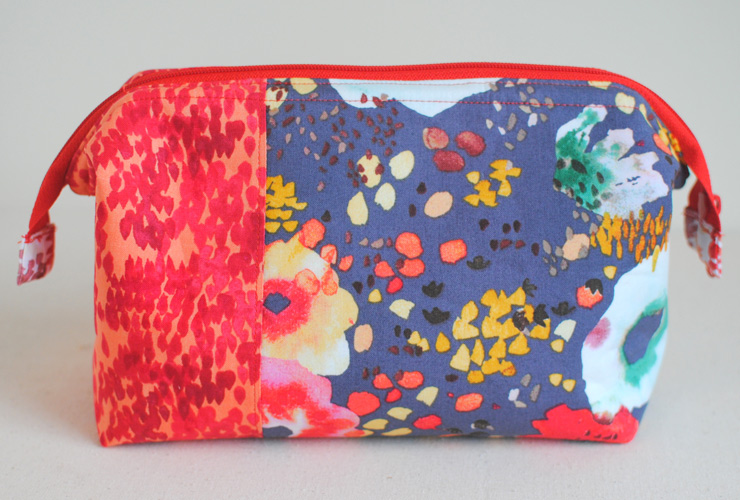 A couple weeks ago I made up the Retreat Bag, a free pattern from Emmaline Bags, and I was so excited about it! I have a gigantic makeup bag with the similar style of frame, but I really wanted a smaller, handmade one and this is perfect. One thing that I thought would be a great addition to the pattern is a divider, so I can separate my makeup from my brushes. So, I added a divider to the Retreat Bag I made and I’m going to show you how to add one too! (I have permission from Emmaline Bags to share this add on to the free pattern.)
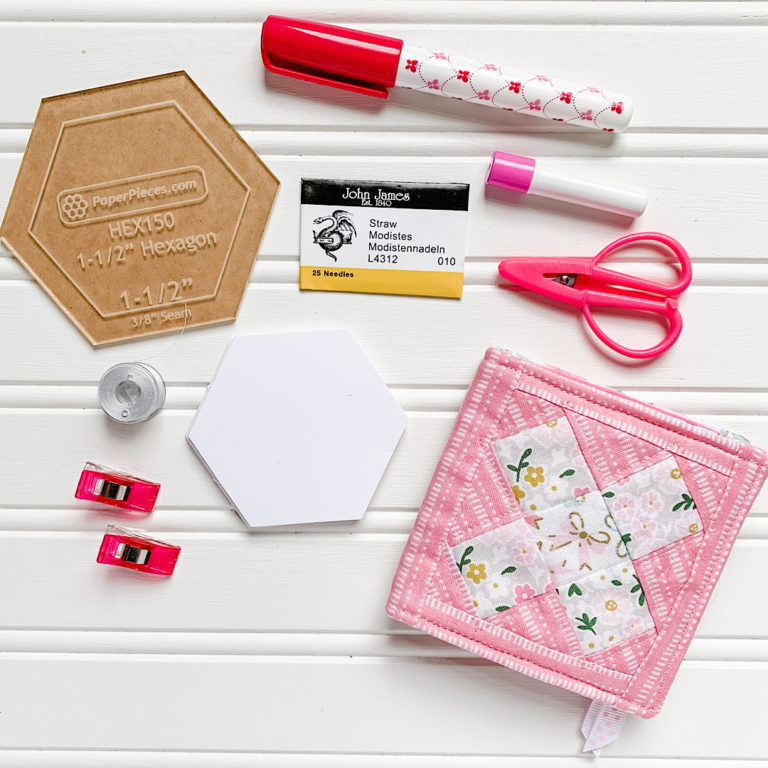
 Begin by downloading the free Retreat Bag pattern from Emmaline Bags and gathering the supplies listed, including the 11″ Wire Frames Style A – these are exclusively at Emmaline bags, Janelle designs them herself and has them specially made.
You can download a PDF of this add on here!
Read through all the directions before beginning. (Also, I suggest gluing the rubber ends on the wire frame, even though I read the directions before beginning, I guess I did not read thoroughly enough, and I did not do this…I wish I would have!)
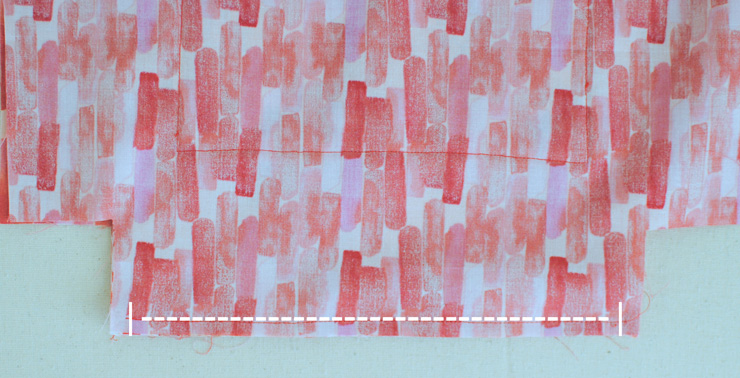
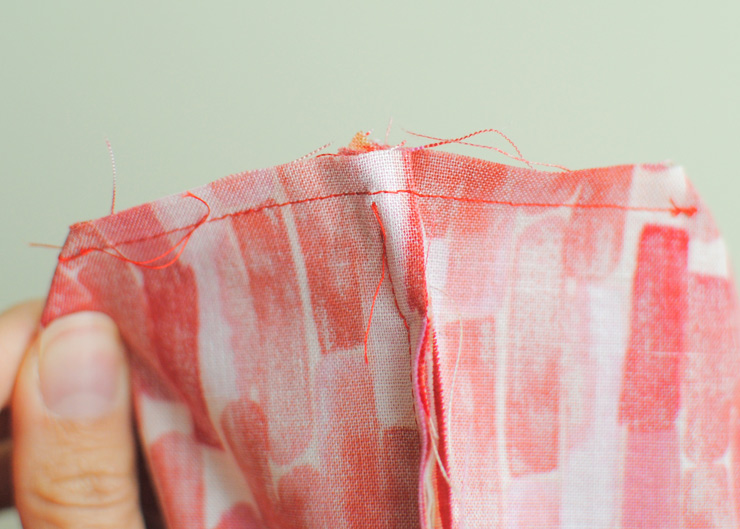
From the lining fabric cut an additional piece that measures 9 1/2″ wide x 12″ tall. From interfacing cut an additional 9 1/2″ x 6″ rectangle. Fold the divider rectangle in half (9 1/2″ x 6″), wrong sides together, and press. Then fuse the interfacing to the wrong side of half of the divider, from one edge to the fold.
Follow the retreat bag directions through step 4, but stop before completing step 5.
 Top stitch the prepared divider at 1/4″ and 1/8″ from the top fold.
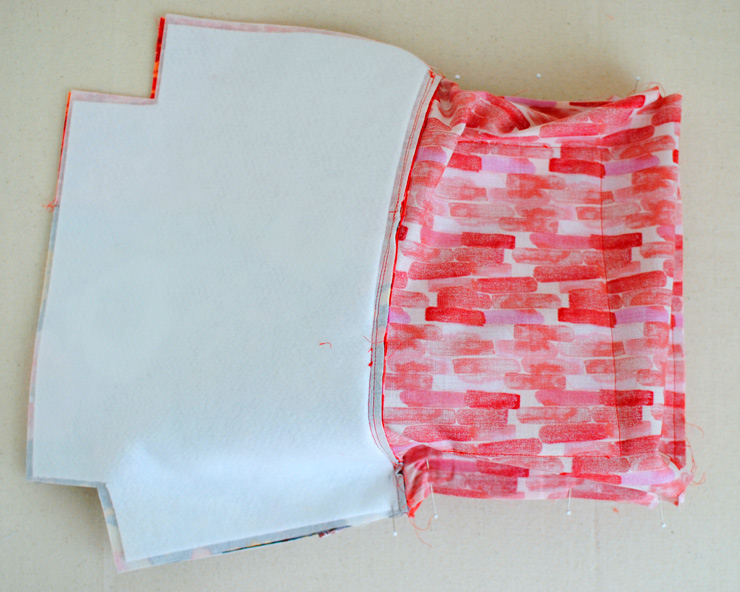
 Arrange the lining pieces so they are right sides together as listed in step 5. Then, place the divider along the bottom edge. Begin sewing 1/4″ from the edge and sew across the bottom edge, stopping 1/4″ from the other end.
Note: while this seam generally has an opening for turning, I found it easier to sew the divider neatly with the seam closed, and then use the seam ripper to open a portion of the seam for turning.
 Then, pull the divider to the lining side seam. This will pull the bottom of the bag up as well. Pin in place, then, starting 1/4″ from the corner, sew along the side seam, continuing past the zipper and onto the body side seam, as directed in the Retreat Bag Pattern. Repeat for the other side.
 Now the bag should look like this.
 Next, fold the corners out, as directed in the Retreat Bag pattern, but press your seams in opposite directions to allow them to nest together. The divider should fold right along with the corners. Then sew with a 1/4″ seam.
 Your sewn corner should look like this; you can see where the bottom seam sewing stopped right before the corner seam allowance.
Continue finishing the bag as directed in the retreat bag pattern. When you reach Step 6, carefully unpick the center of the bottom lining seam, where the divider is, then turn and sew as directed.
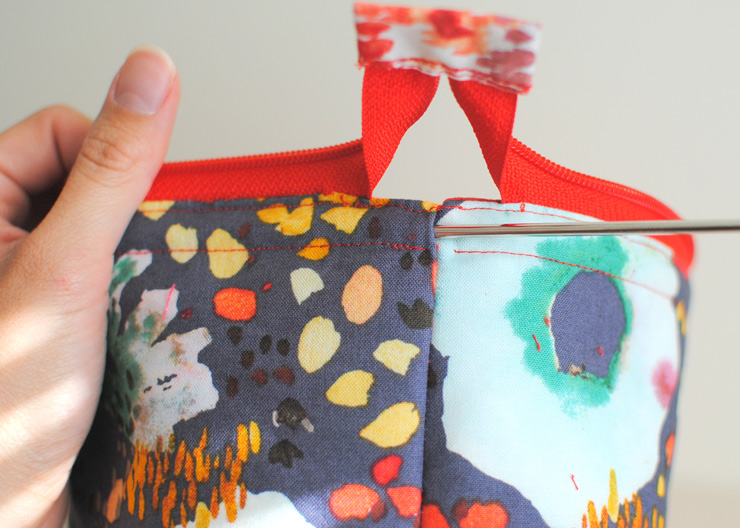 Follow the pattern to sew the frame casing. Sew right up to, but not through, the divider. Instead of using the seam ripper on the lining seam, use your seam ripper to open a few stitches on the outside seam. Slide the wire frame into the casing and sew the opening closed, as directed in the pattern.
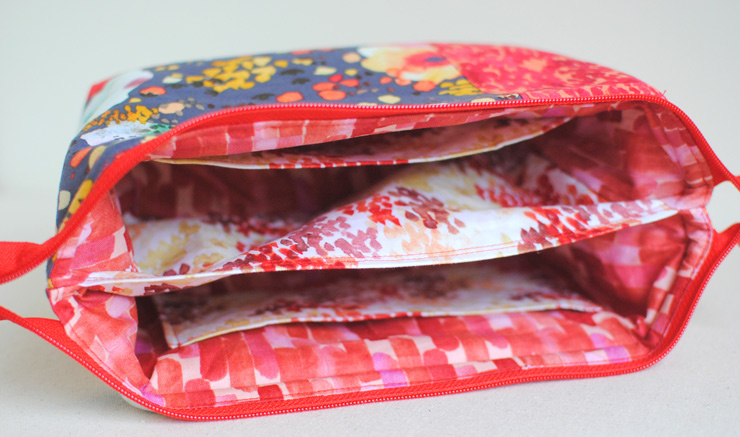
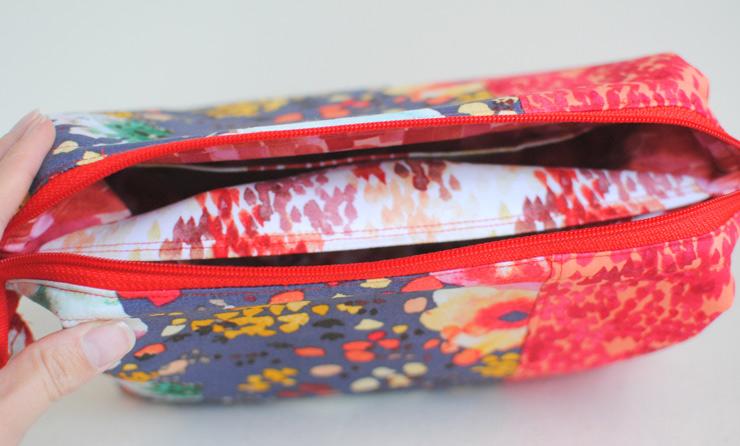 When the bag closes, the divider will fold over a little bit. This should keep all your belonging separated in the bag, should it get tipped over.
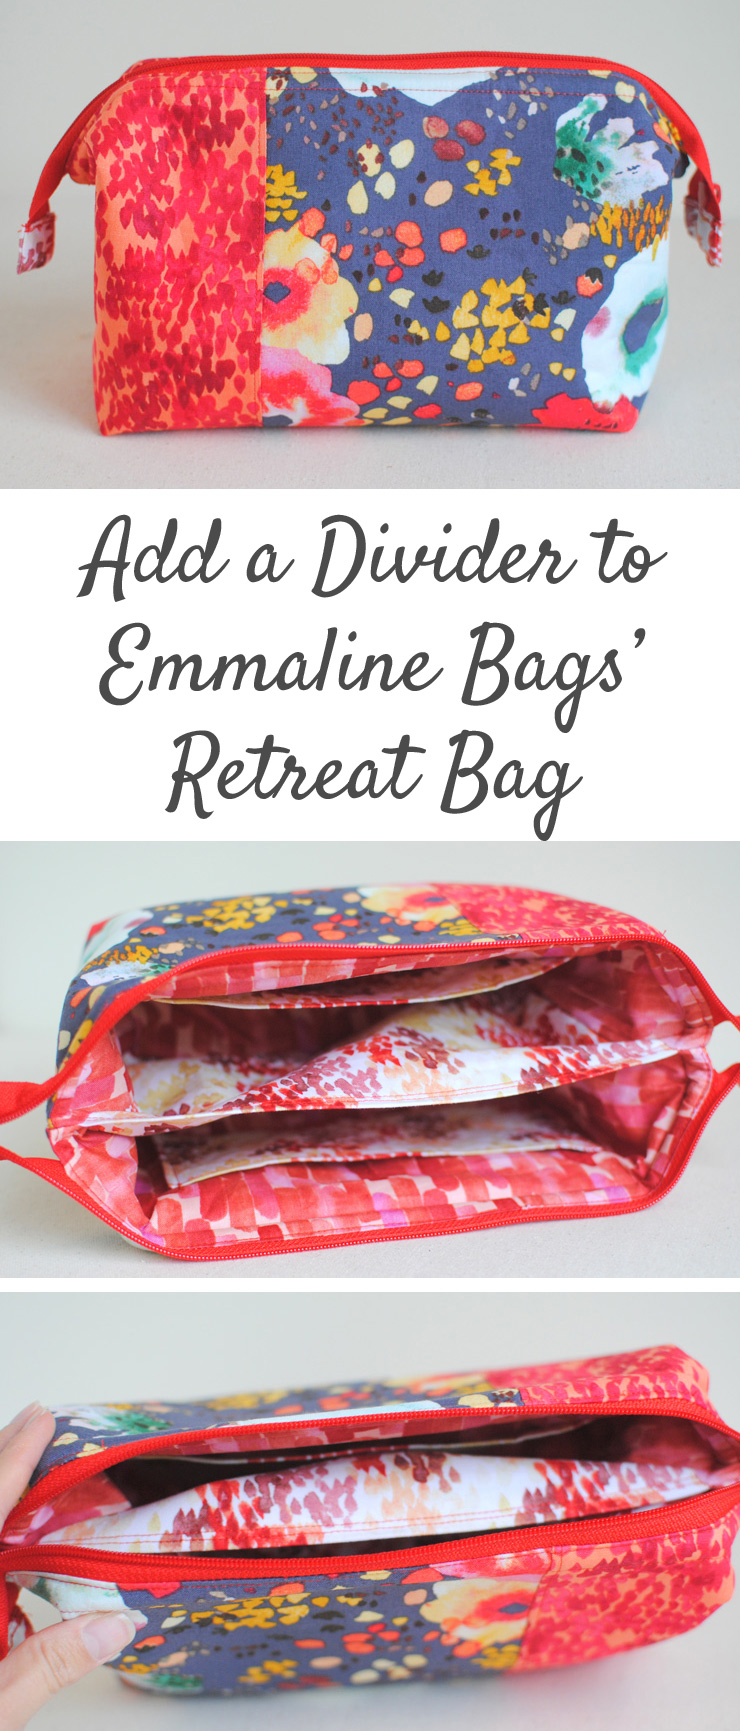
Now you have a great bag that is perfect for makeup, sewing notions, or whatever else you’d like to keep in it, and the handy divider will keep everything separated too!
I’ve also created this Pinterest friendly image if you want to save this for later:

Fantastic addition to the Retreat Bag! Thank you!
I have shared your post on my FB page. I love your blog & patterns.
robin ?
Happy Valley Mercantile
Merci pour ce joli tuto!
bon week end!
coccinelle
I love the fabric you used. What is it?
Thanks, Patricia
The fabric is Flora by Kelly Ventura for Windham, it is just shipping to shops now!
Thank you, you are so good to give these lovely treats.
I just wanted to make sure I asked/let you know……I am creating a link to this tutorial for my December block, in the One Block Wonders BOM. I have made Emmalines Retreat Bag pattern as one of my samples with a mini version of the block. Though I didn’t use your tutorial for this bag I did for the previous one I made, and I thought everyone would love to see this option. (I love it! I shared a picture of the one I made with your divider too) If there is any problem with me doing this link, let me know before the first Friday in December so I can remove!!
Do you sell this bag? I would LOVE to buy one with a divider.. have scoured the internet with no luck!
Hi, this tutorial is for the small size retreat bag, correct?
Yes, I believe the small size, there was only one size when I made this tutorial 🙂
Hmm my daughter wants me to add a central zipped pocket to her birthday bag but leave out the wires. I will have to sew a prototype using your tutorial and tweaking it a bit but I wonder if leaving out the wires will stop the divider from folding over at the top – that could be a bit of a problem with a zipped pocket with things in it. Cant wait to find out lol. Thanks for the tutorial x
Thank you for the mod to this classic bag! 😀