
Learn How to Upcycle by Sewing with Fabric Selvages

Upcycling by sewing with fabric selvages is such a fun way to use up those pretty edges that show the color dots, or variety of other cute images, on the edge of fabric. I love incorporating these with other strips and scraps of fabric to make a really cute piece of patchwork, let me teach you how to do it!
Sewing with Selvages Video

Prepare The Paper Backing

First, for this specific block, there are chevrons in the center with the star points, so, on two of the 5″ x 4″ paper rectangles, draw a 45 degree angle going one direction, then draw it the other direction on the other two.
Start Sewing the Selvages to the Paper
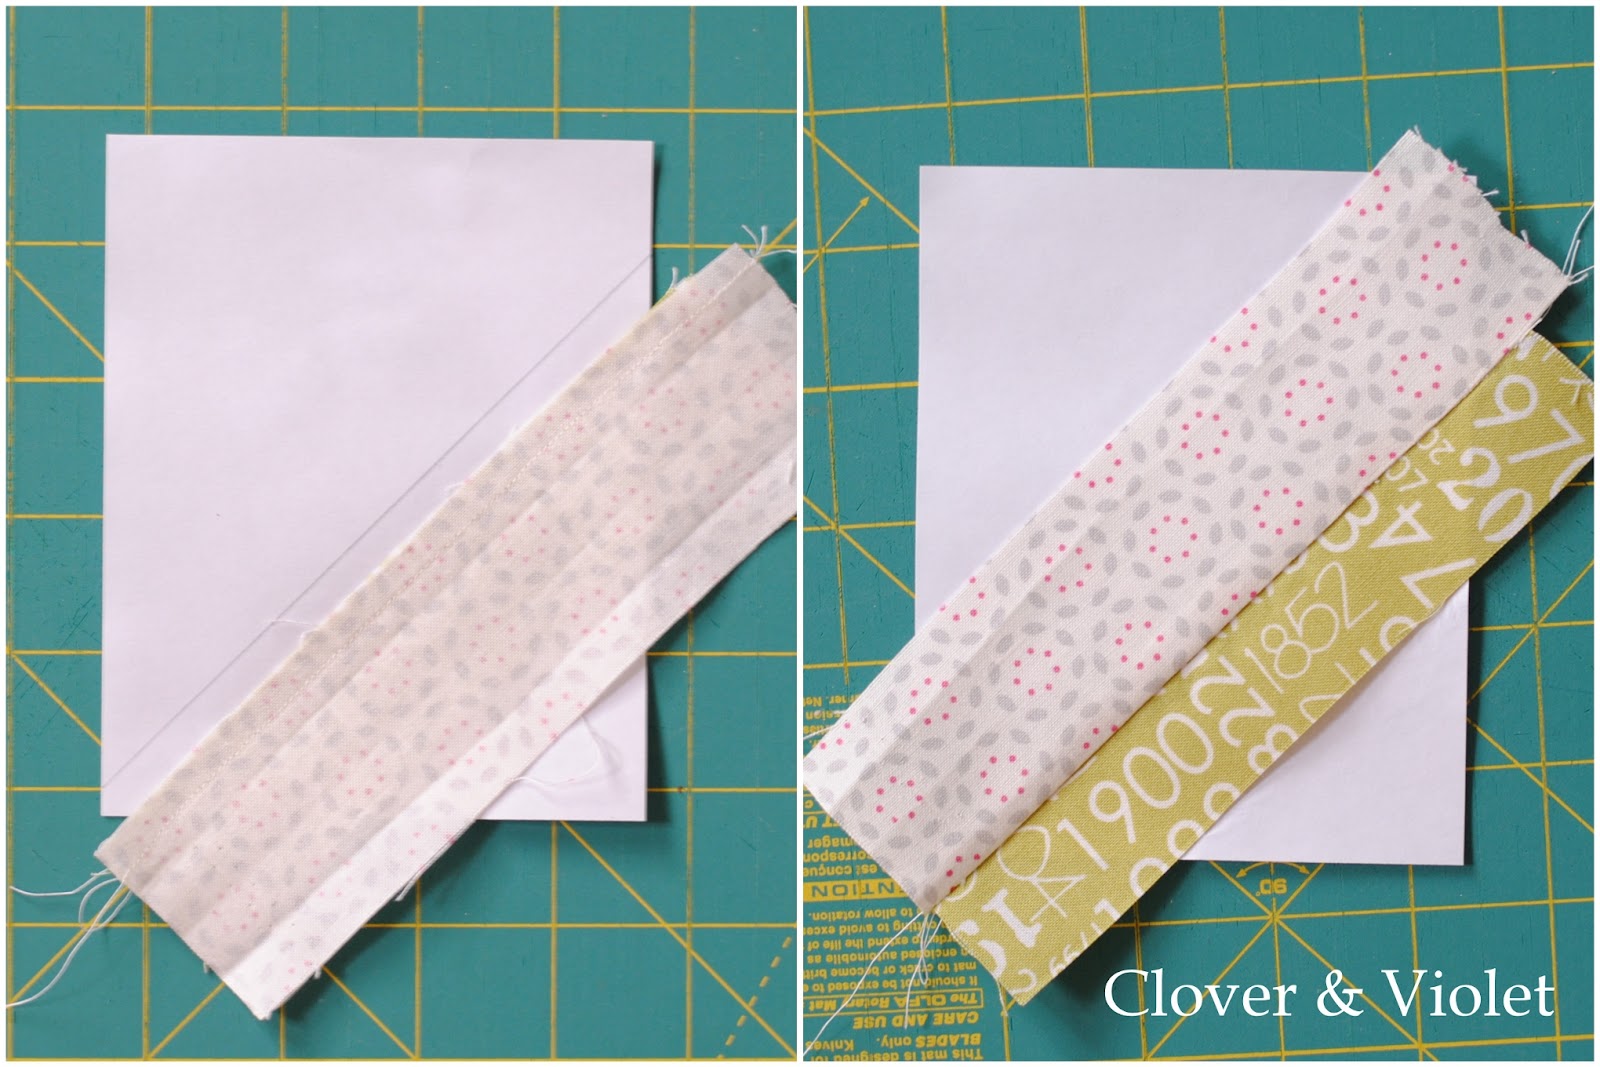
I find that strips ranging from 3/4″ to 1 1/2″ and anywhere in between are the best sizes for these blocks. Adjust your stitch length to something shorter, this will make tearing the paper away much easier {I set mine at 1.5 instead of its regular 2.5}.
Continue Sewing the Fabric
Start with two strips, right sides together, then place them parallel to one of the drawn angles and stitch them down. Then press them open. Place another strip, right sides together with the edges matching and continue sewing in the same manner.

To add a selvage, place the fabric right sides up over one of the strips, with about 1/4″ extending beyond the selvage edge. Then stitch the selvage down on both sides, as shown in the picture above. This will give the seam plenty of strength and keep the selvage in position {since selvage edges don’t have the same stretch as the body of the fabric. Please note: do not cut the fabric above the selvage away, this will leave a raw edge on the top of the quilt block!
Trim the Selvage Block
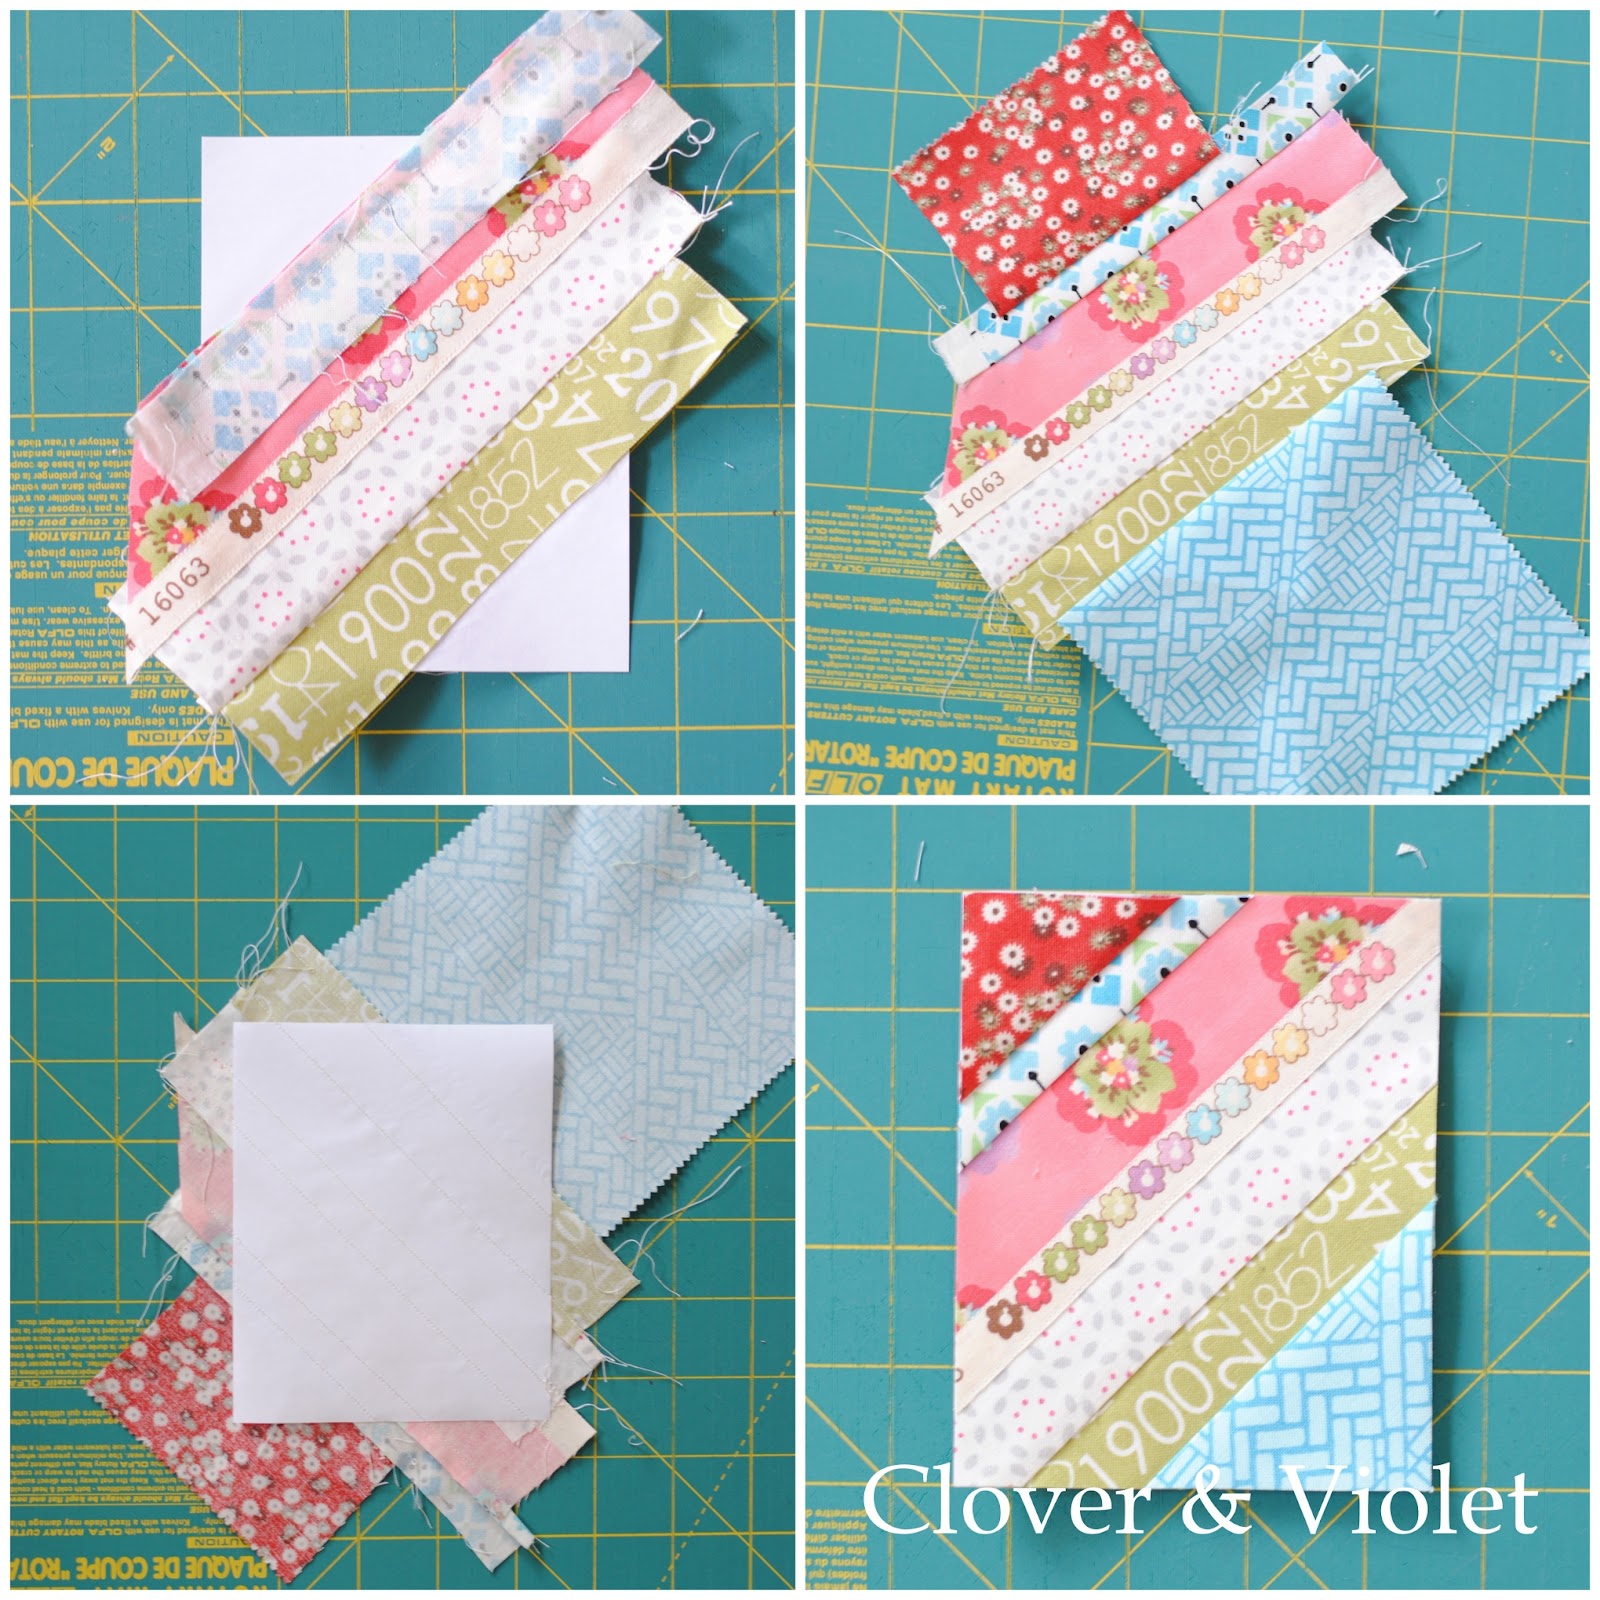
Then continue piecing the block by sewing strips right sides together and then pressing open. Your fabrics should extend a little bit beyond the papers. Then, from the back side trim to required measurement. Please note: this may not be the exact size of the paper, so please measure the block when you trim!
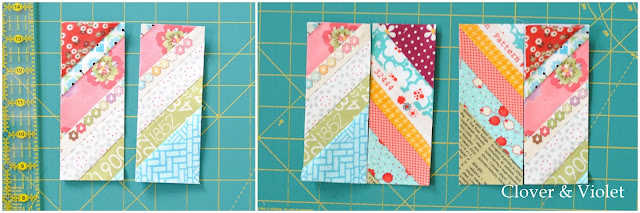
For this particular block, you will then cut the 4″ x 5″ rectangle into two 2″ x 5″ rectangles. When you place this rectangle with one going the opposite direction, you will have the chevrons. Piece the corner 5″ x 5″ squares in the same manner, but it won’t matter what direction the angle is going, as long as it is diagonal across the square!
And there you have it, a little bit of sewing with selvage edges, I’m really excited to see some string blocks come together!
Looking for a project to make with these selvages? I made a scrappy star block and love it!
Love this block!
Very cute idea to incorporate selvedges.
Very cute idea..I’m going to have to start saving the selvedges that are cute!
I have a collection of selvages! Time to use your great tutorial!
I actually just did my first project with selevdges and I loved it! I’ll definitely be doing more. I especially like the ones where the colour dots are fun shapes, like the flowers on yours!
I love your fabric selections, especially that gray and pink one…how pretty!
I LOVE your BLOG
greatings from switzerland
Jacqueline ♡
http://jacquelineswhitehome.blogspot.ch/
Great tutorial – love these blocks! 🙂
I love the fabrics you used!
I like.
great idea to use up those tiny scraps. love how it is turning out
Great tutorial.
I love blocks with selvedges but have never really know how-to before
Thanks for sharing this xxxx
Thanks for this tutorial, I like your bags !
So very cute! I use selvages up too!