
Fabric Traveler’s Notebook {Mini Tutorial}
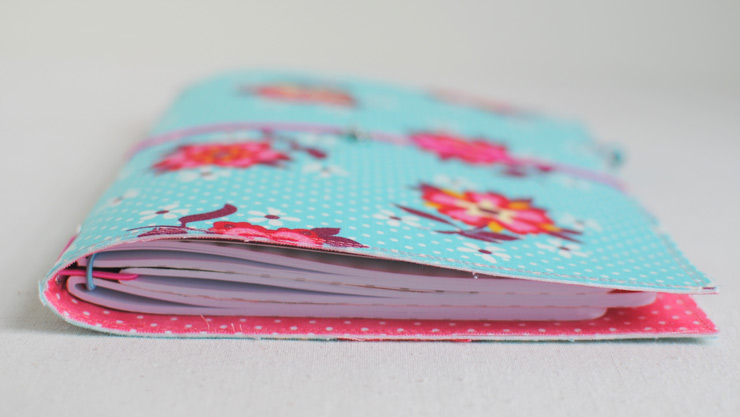
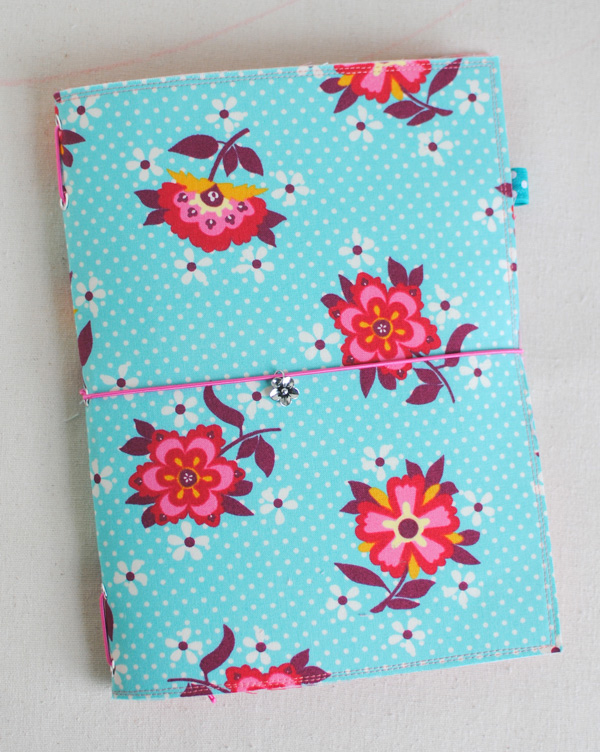 As a fabric and planner lover, I’ve been seeing some amazing traveler’s notebooks made out of fabric. A traveler’s notebook {the brand name is Midori}, if you’re not familiar with them, is a notebook cover with elastics that hold interchangeable notebooks inside. While I searched around online and found lots of tutorials for making leather, even vinyl notebooks, but I didn’t see any made out of fabric {I probably wasn’t searching for the right key words…}. So, I figured I’d just experiment myself. Above is the traveler’s notebook I made a friend. To make your own you’ll need:
- Notebooks – here’s a great tutorial to make your own
- The large ones pictured measured 6″ wide x 8 1/2″ tall
- A standard Midori measures 4 1/4″ wide by 8 1/4″ tall
- A pocket Molskine measures 3 1/2″ wide by 5 1/2″ tall
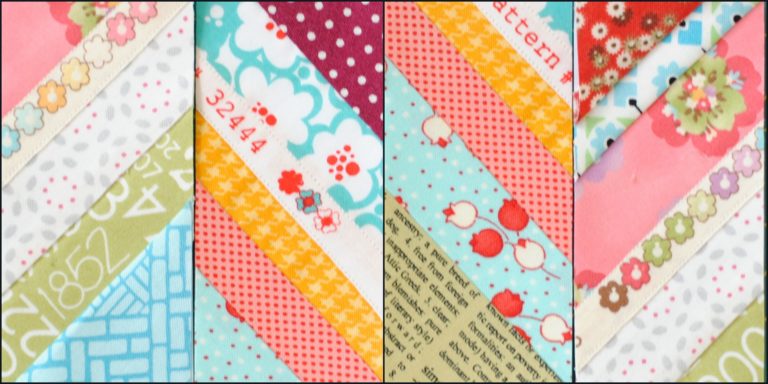
- Fabric – Two rectangles of the following size
- Large: 10″ wide x 14″ tall
- Standard: 10 1/4″ wide x 9 1/4″ tall
- Pocket: 9″ wide x 6 1/4″ tall
- UPDATE: Use Pellon® Peltex® 72f Double Sided Fusible or Vilene Fast2Fuse
- OR Sturdy Interfacing {I used Pellon® 808 Décor Bond or 809 Craft Fuse – both are essentially the same}
- AND Pellon® Wonder Under {to fuse all the layers together}
- 2mm Elastic Cord {I bought mine in pretty colors here}
- Optional: Eyelets {I used some from a fabric store, but wasn’t impressed with the quality, I think I’ll try these next time}
- If using Peltex®, omit eyelets and use an awl
- Optional: 1/2″ elastic for a pen loop
 To make your traveler’s notebook, cut the fabric 1-2″ larger than your open notebook {the more notebooks you plan to carry, the larger you’ll want the cover}. Then interface the wrong side of both the outside and the lining fabric with the heavy interfacing. Use Wonder Under to fuse both layers together. Make sure you use plenty of steam and take your time so that all the pieces get fused evenly.
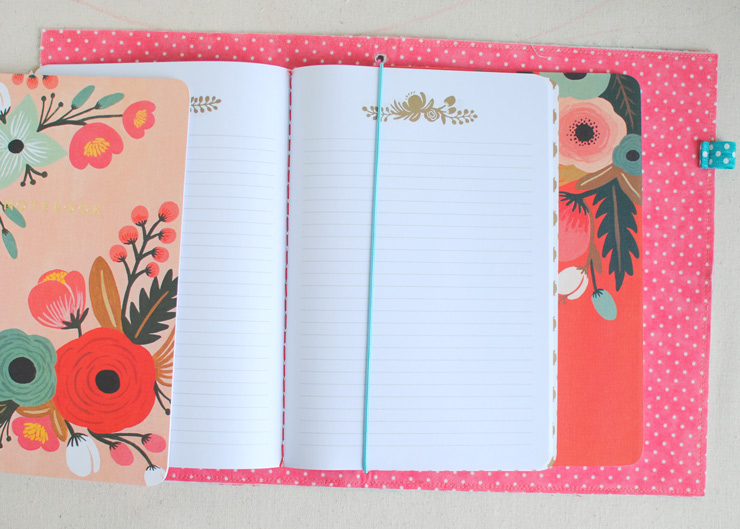
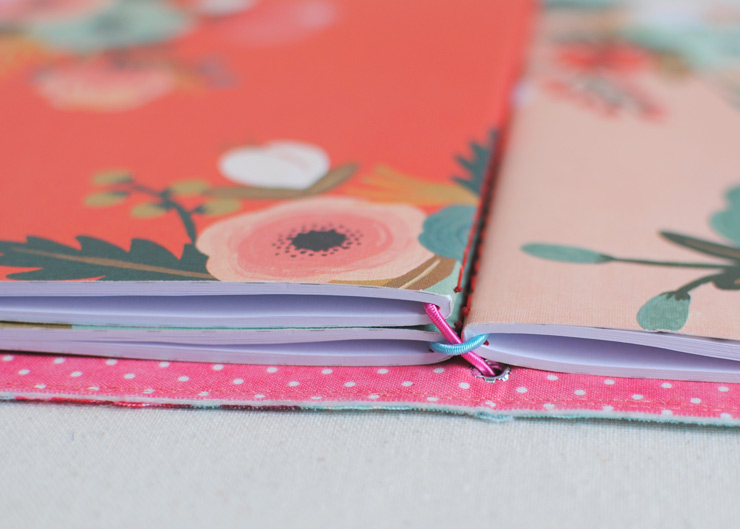 Once you’ve assembled your layers, you’ll need to punch holes. I punched mine like this and love how they turned out, though I did move the closure loop to the spine. To add extra loops for more notebooks, just tie a circle of elastic and slip it around a notebook that’s already in the cover.
Here’s my notebook fused with Peltex instead of the two layers of interfacing:

Update: Instead of eyelets, use an awl to punch the holes, being careful to separate the fabric and not break threads when making the holes. Use a large needle to feed the elastic cord through. The traveler’s notebook above is punched with an awl.
I made my holes 3/8″ from the top and 1/2″ apart. I think they’re perfect for a couple notebooks!
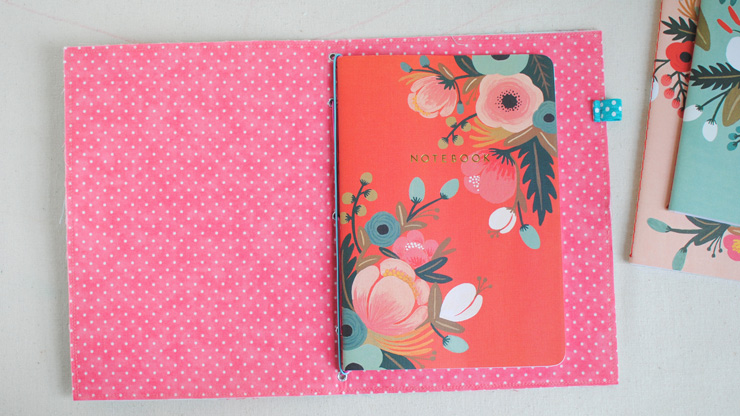 I did also sew 1/8″ and 1/4″ from the outside perimeter to make sure all the layers stay together. I made a little loop out of 1/2″ elastic and sewed it into the perimeter seam for a pen loop too.
 And there you have a fabric traveler’s notebook! It came together really fast and I’m looking forward to making a couple more of these. I think they’d be great teacher gifts, since it’s that time of year already. I’m kind of wanting to try a scrappy one too…we’ll see how that works out.
Thank you for this darling tutorial….so cute and clever!
OMGosh! I’m now wishing that I had a notebook like that so I could make myself a cover! Perfection.
So pretty! I just bought supplies to make these out of leather for my husband. Maybe I need a fabric version for me!
Oh my that is so amazing! So clever and so pretty.
Love this tutorial! Can’t wait to give it a try! I have a Midori that I couldn’t live without but a fabric one would be soooooo much better!
Not sure I understand how you punched the holes in the fabric. Did you use an awl and hammer or a paper hole punch? Your covers are so creative! Thanks for sharing.
sooooooooooooooo clever
Are you saying you omitted the eyelets altogether when you used the Peltex? Any chance of getting an inside look at your most recent cover that shows the holes?
Thank you for this great tutorial! I just made one last night and love it!
Nice tutorial. I just made one for my smaller notebooks. I have a beautiful teal leather fauxdori for my larger notebooks, but wanted something for my smaller moleskine for when I am using a smaller purse (must always have notebooks with me!) ; but did not want to spend the money on another leather – this was perfect, turned out great, and was practically free since I had most all the supplies already
Such beautiful work and a great tutorial. Thanks so much for linking to my tutorial for making the inserts.