
Twinkle Lights Quilt Along Kick Off & Cutting Tips #twinklelightsquiltalong

Welcome to the kick off of the Twinkle Lights Quilt Along! If you want to join in, get your copy of the quilt pattern here! This is a low key quilt along, but in hopes of getting my quilt finished around Christmas, I thought it would be fun to quilt along with all of you too! But, this is not exclusively a Christmas quilt, I’m just making mine with Christmas fabric. So, here’s the schedule (I have updated it a little bit to spread out the sewing):
Nov. 18: Choose Fabrics/Begin Cutting
Nov. 25: Finish Cutting/Sew 6 Large Stars
Dec. 2: Sew 6 Large Stars
Dec. 9: Sew 7 Small Stars
Dec. 16: Sew 6 Small Stars
Dec. 30: Assemble Quilt Top
Jan 6: Assemble Quilt Top & Finishing
Jan 6-20: Finishing & Link Up
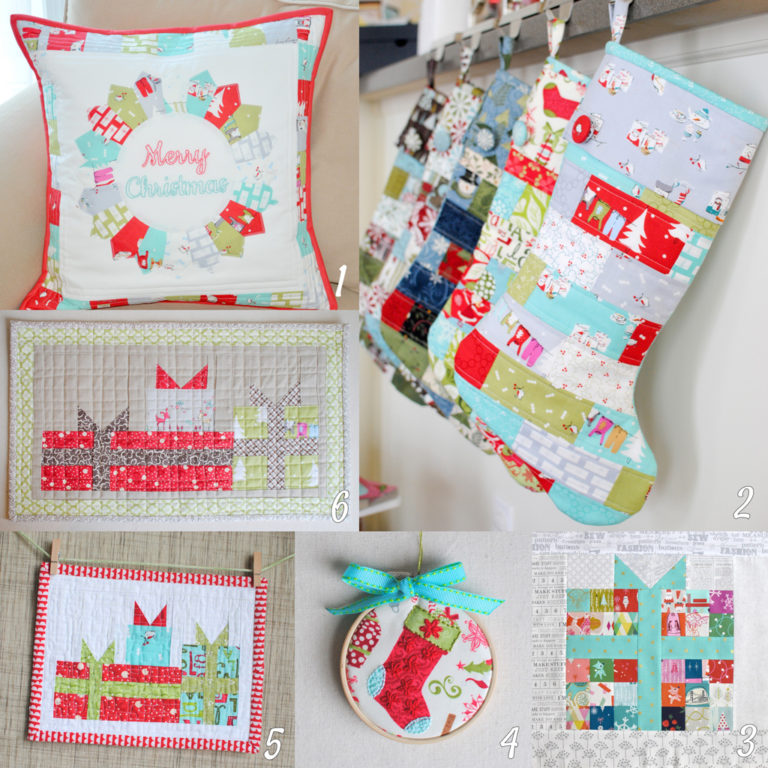
Now, let’s look at some of the sponsors I have lined up to provide giveaways! I’m still working on solidifying what the prizes will be, but here’s a peek at what’s coming your way! (If your shop is interested in sponsoring or offering kits, please let me know!)


To join in the quilt along, all you need to do is quilt along with us and share your posts! You can share on Instagram using the tag #twinklelightsquiltalong and making sure to tag me @cloverandviolet, same with Facebook. Alternately, if you have a blog and not social media, you can leave a comment with the link to your post on this or any of the future quilt along posts.
Cutting Tips
Since this week we are gathering our fabric and starting to cut, I wanted to share just a couple tips with you:
Before you begin cutting, chose which fabrics you’ll make into the large stars and which you’ll make into small stars. You can download the coloring sheets here, if you want to try out color placement before you cut:
Since this pattern uses fat eighths, make sure you give them a good press and square up the edge before you cut. There’s enough cutting room in the layout to square up the fabric, but not enough for extra pieces so make sure the edge you are starting with is straight. And, especially if you plan to use steam to press your blocks, steam your fabric first. Occasionally I find a little shrinkage if I’ve not steamed a block before I cut it and then steam it later!
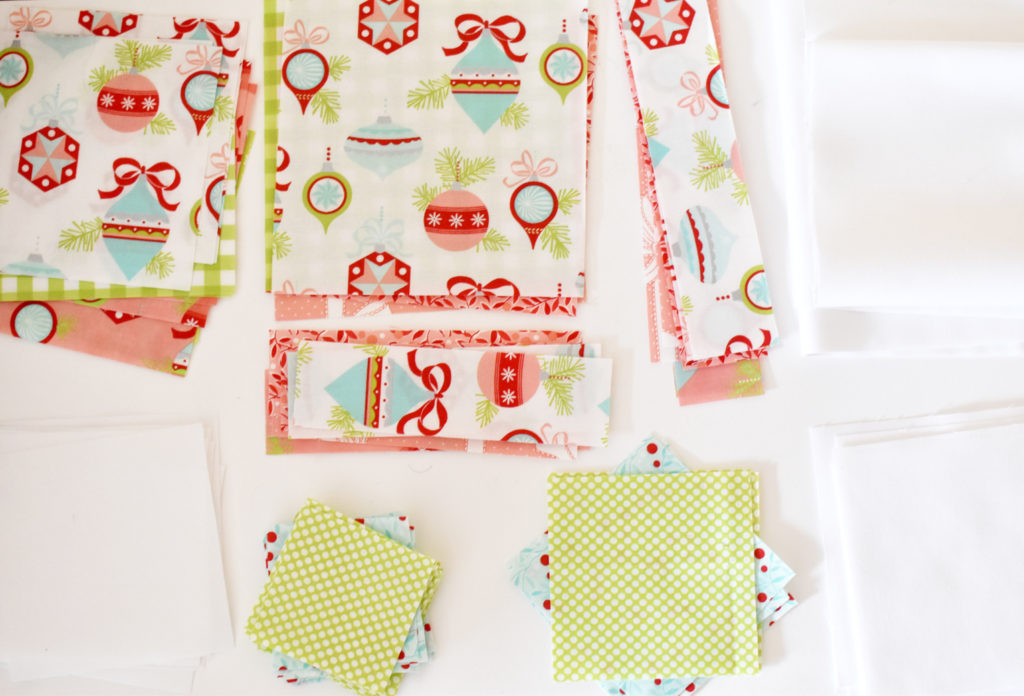
I’ve been cutting my blocks two or three fat eighths at a time. Since there isn’t a ton of extra fabric, I find that for me I’d rather cut more than make a mistake and be unable to use my pieces. I keep them sorted by size until I’m working on the blocks.
Get Started!
I cannot wait to see your quilts! I’ll be back next week with some Large Star trimming and sewing tips!

What a beautiful quilt. Thinking of making two at the same time . One with Christmas fabrics and the other still haven’t decided..