
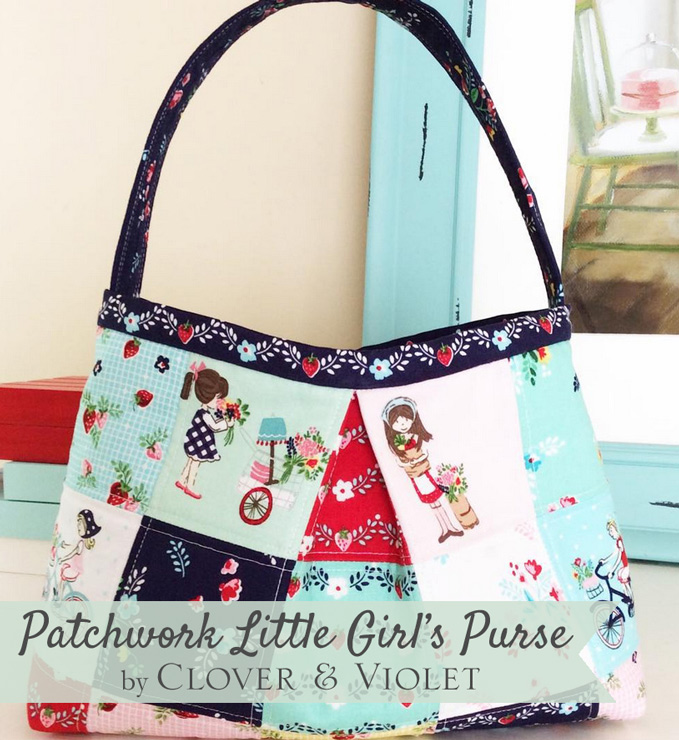
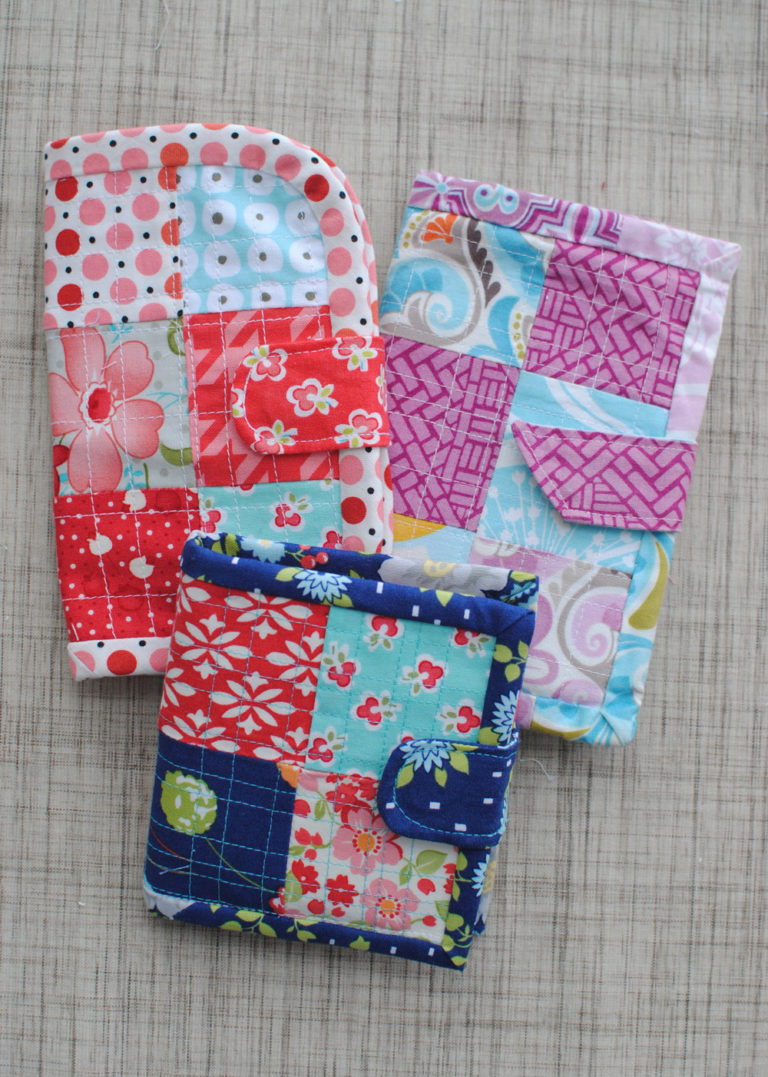
Patchwork Little Girl’s Purse {Tutorial}
 I made some little purses for my granddaughters, and they turned out so cute, I wanted to share the tutorial with you! There’s a littlest size {for Lydia} and a little girl size {for Norah}.
Let’s get started with the supplies needed and then the construction.
Littlest Girl: approx. 7″ wide x 5 1/4″ tall
- Fabric:
- 30 – 2.5″ squares for patchwork
- 1- 10 1/2″ x 12″ piece for lining
- 1- 2 1/2″ x 13″ piece for strap
- 1- 25″ x 2 1/2″ piece for binding
- Fusible Interfacing:
- 1- 2 1/4″ x 13″ for strap
- Flannel:
- 2- 1 ” x 12″ for strap
- Fusible Fleece:
- 1- 10 1/2″ x 12 1/2″ for body of bag
Little Girl: approx. 9″ wide x 6 1/2″ tall
- Fabric:
- 30 – 3″ squares for patchwork
- 1- 13″ x 15″ piece for lining
- 1- 3″ x 14″ piece for strap
- 1- 3o” x 3″ piece for binding
- Fusible Interfacing:
- 1 – 2 3/4″ x 14 for strap
- Flannel:
- 2- 1″ x 14″ for strap
- Fusible Fleece:
- 1- 13″ x 15 1/2″ for body of bag
Read all directions before beginning, all seam allowances are 1/4″, unless otherwise stated.
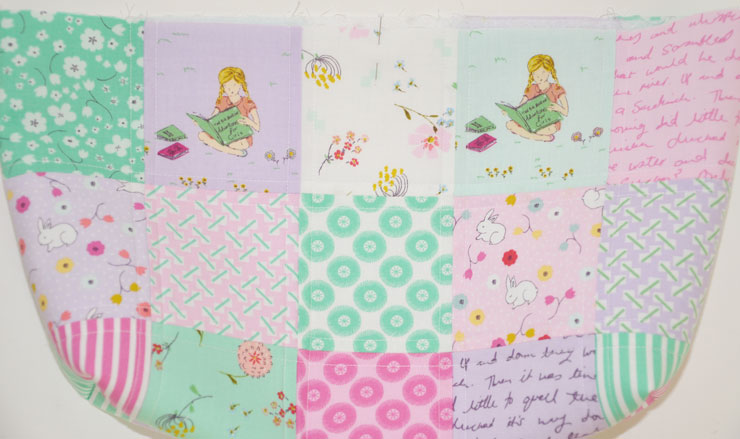
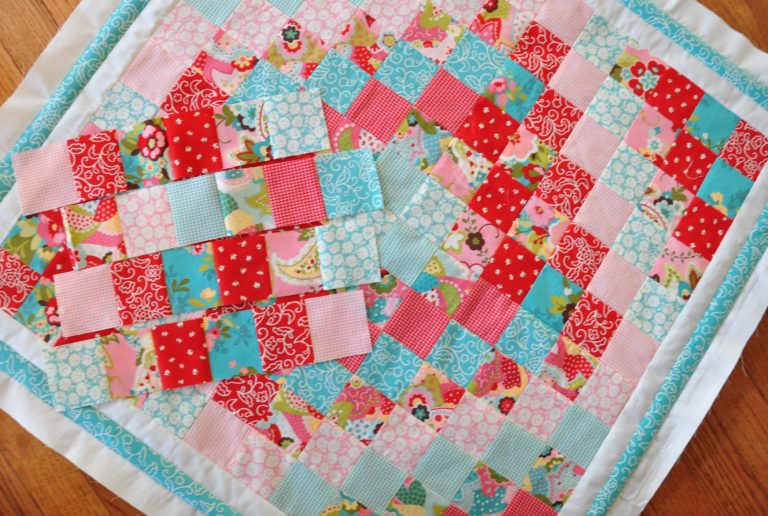
Choosing the fabric is my favorite part. You will have two squares of each print, this will make the front and back of the purse look the same. This is not necessary, it’s the way I made mine.
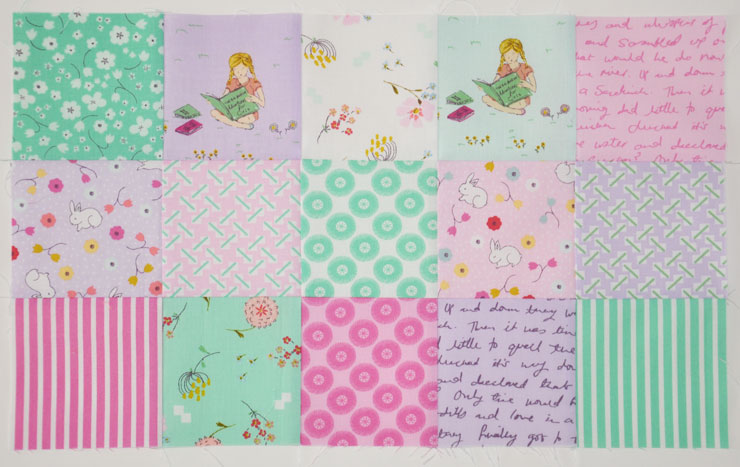 Sew the patchwork squares five across by three down using 1/4″ seam allowances. Make two panels, these will be the front and the back of purse.
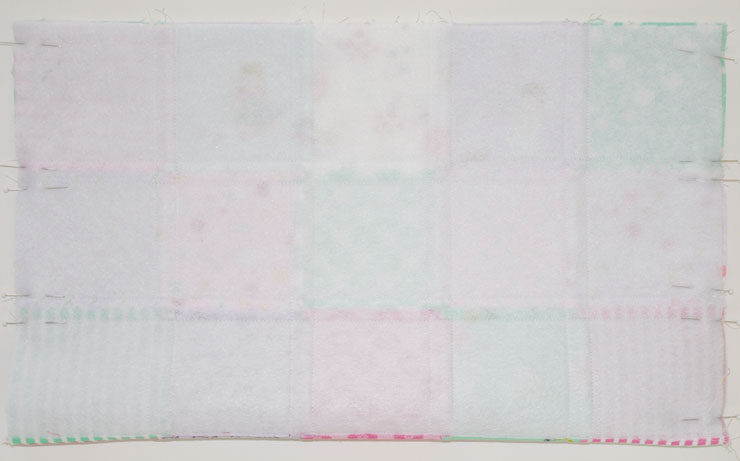
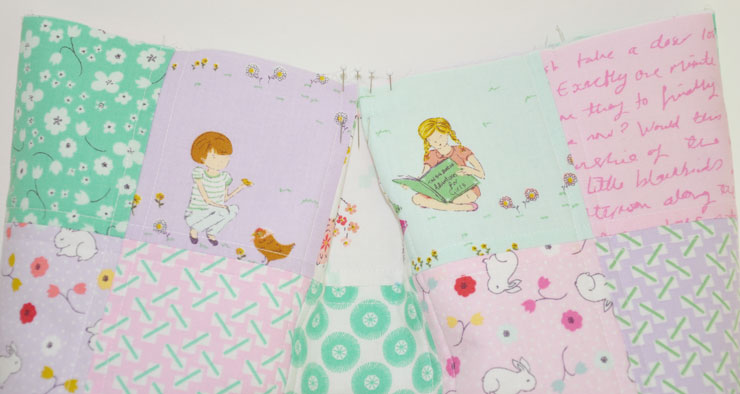
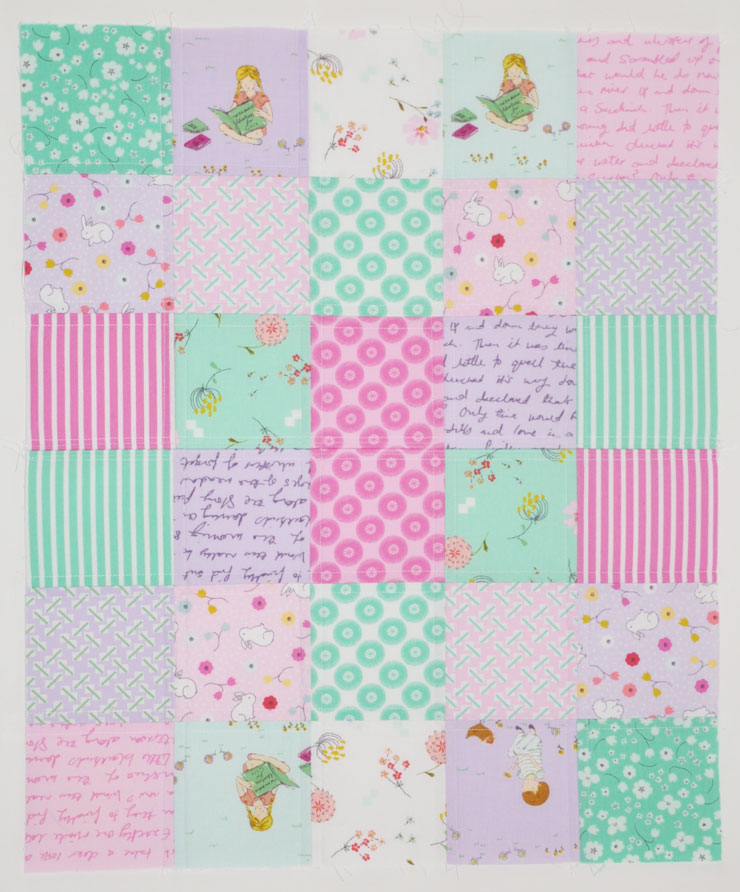 Sew the two panels together to create one piece. Make sure the squares are opposing each other at the opposite ends so they will be correct. Fuse the fusible fleece to the back of the panel. (Follow the directions on the product you are using.) Quilt the squares 1/4″ on either side of the seams to create a patchwork piece.
 Sew the side seams with right sides together using a 3/8″ seam allowance. Pin in place to make sure your squares line up at the seams.
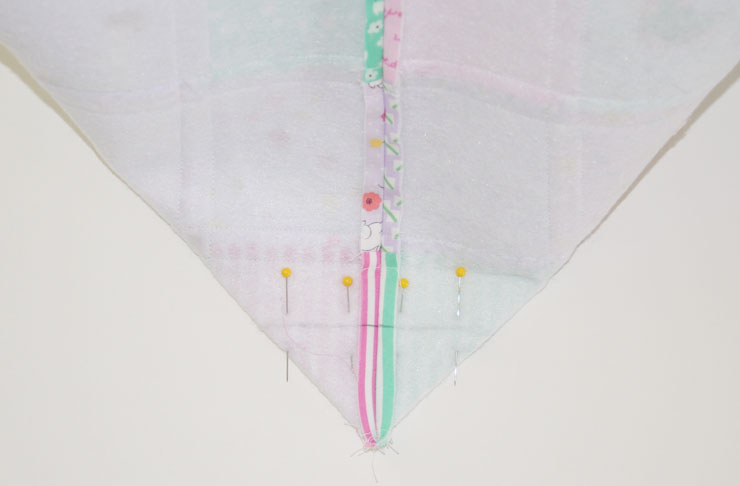 Press the side seams open and fold the sides to create a point, measure 1 1/4″ from the point, draw a line with a pencil or pen, then sew across this line, cut excess off leaving a 1/4″ seam allowance. This will make a box at the bottom of purse. For the larger size purse draw a line 1 1/2″ from the point and sew a seam then cut leaving a 1/4″ seam allowance.
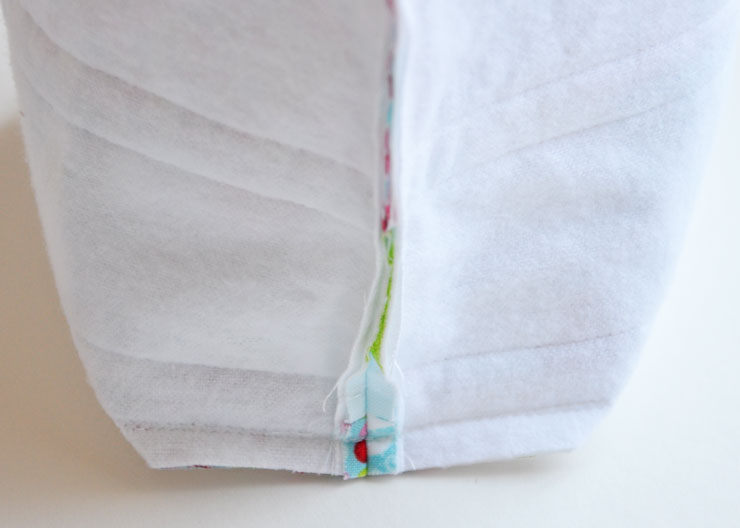 Trim off the excess and leave 1/4″ seam.
 Turn the purse right side out. Place a pin in the middle of the purse front and back for the pleat.
 Take the seam from the adjoining squares and pin at the middle where the other pin is. This will make the pleat. Do this for both the front and back.
 Sew along the top edge to hold the pleat in place. Sew the lining piece the same as you did for the outer purse, side seams, and corners. Place the lining inside the bag wrong sides together. Make the pleat using the outside of the purse for the guide, pin in place. Stitch along the top edge of the purse to hold them together.
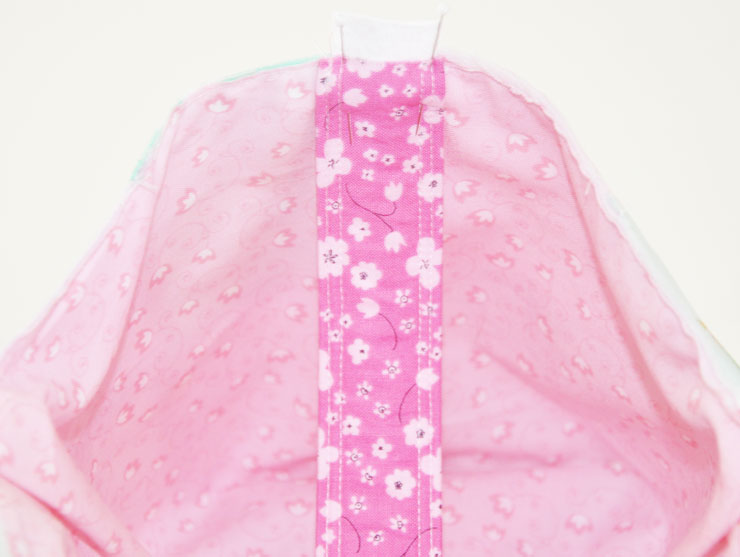
 Fold the binding piece in half lengthwise and press. (top strip)
 Fuse the interfacing to the wrong side of the strap piece. (bottom strip)Sew the strap in half lengthwise to create a long tube, press the seam allowance open.
 Turn the strap using a safety-pin or bodkin. Press it flat with the seam running down the middle back. Feed the flannel through the tube with the safety-pin or bodkin. Stitch along the long edge of the strap 1/8″ and 1/4″ to finish it.
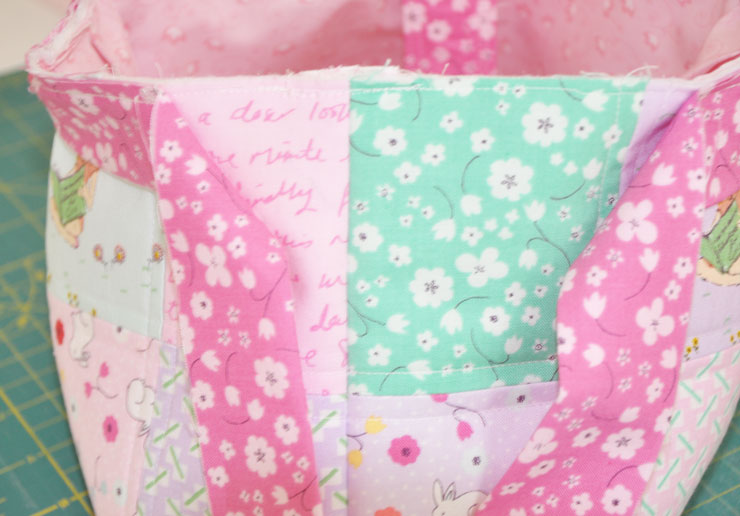
 Pin the strap along the side seams, making sure to place the seam of the strap downward with the seam of the lining. After sewing it in place trim excess flannel.
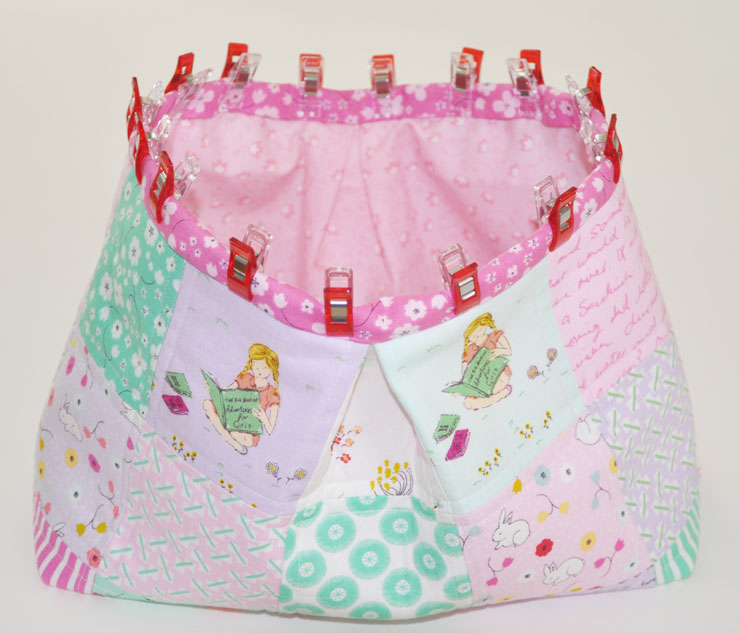
 Attach the binding to the top of the purse, leaving tails open at the beginning and end of the binding piece. Sew the ends into a complete circle. Now sew the unsewn portion of binding onto the top of the bag.
 After the binding is sewn all the way around the top of the purse fold it over to the inside of the purse and stitch it down.
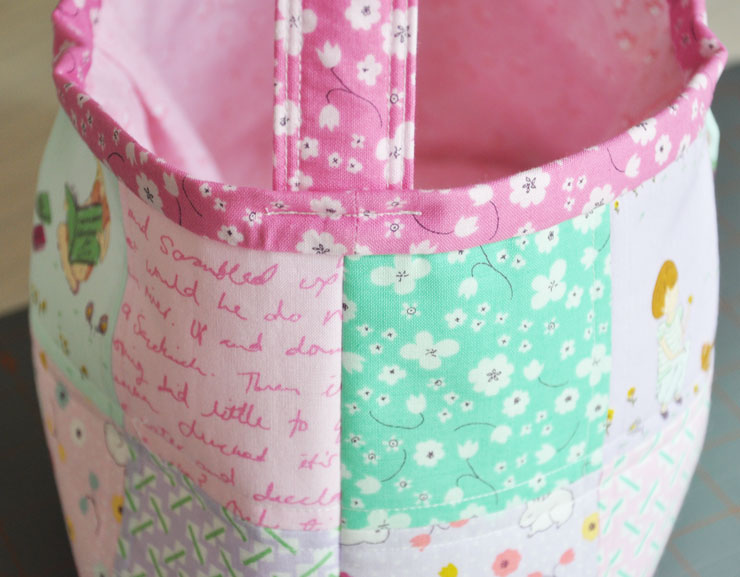 Now pull the strap up and sew a stitching line to secure the strap in place.
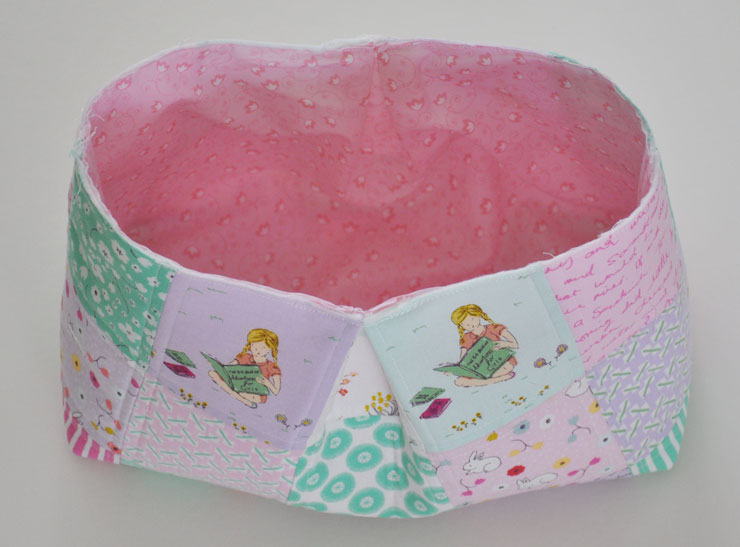
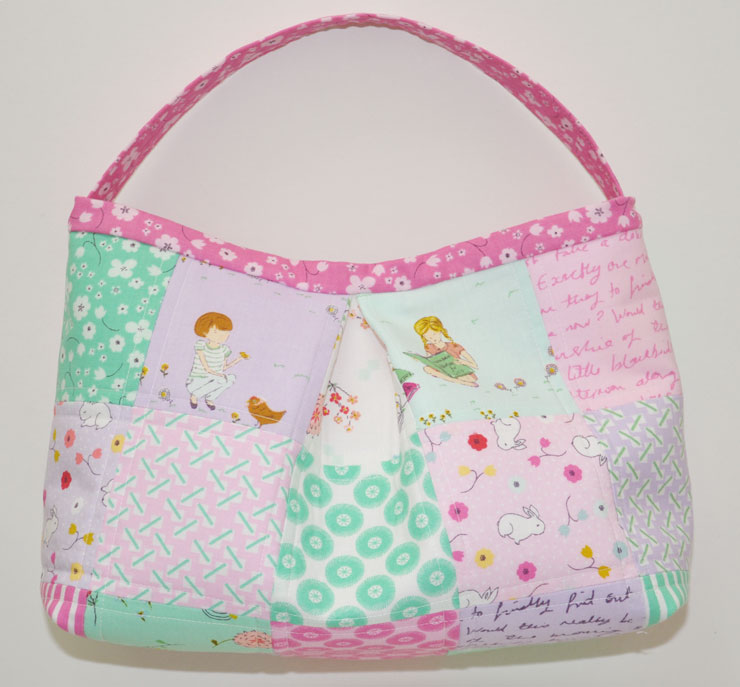 And here is the finished little girls purse. Have fun making it. I would love to see pictures of your finished little girls purse. Send us an e-mail or share on social media with the tags #patchworklittlegirlspurse and #cloverandviolet {you can tag me too @cloverandviolet2!}.

Love, love, love this tutorial for the cutest little purse! Your granddaughters are going to love them. Thank you for sharing.
Thank you for this tutorial. I just love the simplicity of it and just might attempt one for my little granddaughter. Your purses are so cute and special. (Lucky Norah and Lydia)!!
Clara, these are so very sweet! I know the girls must be enjoying them. XOXOXO
They are absolutely adorable! Thank you so much for the tutorial!
Too cute! Don’t you just love having granddaughters to sew for. (Grandsons are nice, too, but so much more limiting when it comes to sewing for them.)
What a cute purse! Thanks for the tutorial ?
This is just too cute for words! I have two daughters who would love these. Thx for sharing.
Love this tutorial you make it look so easy 🙂 Some tutorials you find Just seem to confuse me but not yours Just the project I have been looking for So sweet Thanks kraftykiki 🙂
Such a sweet purse. Can I ask where you purchased the binding clamps? I love them!
LOVE THIS — ?? why not put the straps on under the binding and then flip them back up to attach to binding– would be stronger
just thinking