
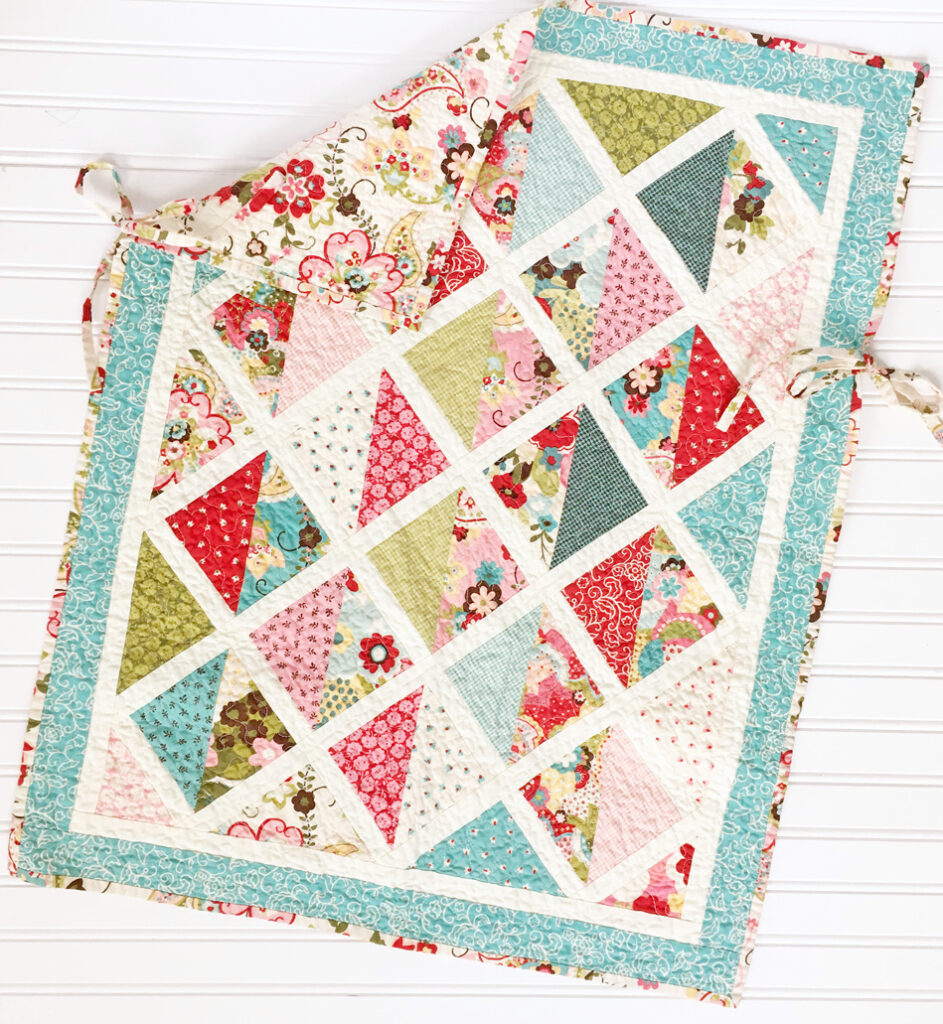
Sophie Car Seat Quilt Free Pattern

Today I am resharing the Sophie Car Seat Quilt Free Pattern, I made my daughter the original quilt back in 2012. I originally shared this free pattern on the Moda Bake Shop, the webiste was updated and my tutorial didn’t transfer over. I’ve had a couple messages looking for it, so I wanted to share it here.
Looking for a downloadable version?
We know you may want a printable, download version of our most popular freebie! You can grab it in our shop here: Sophie Car Seat Quilt PDF Printable.
Original post:
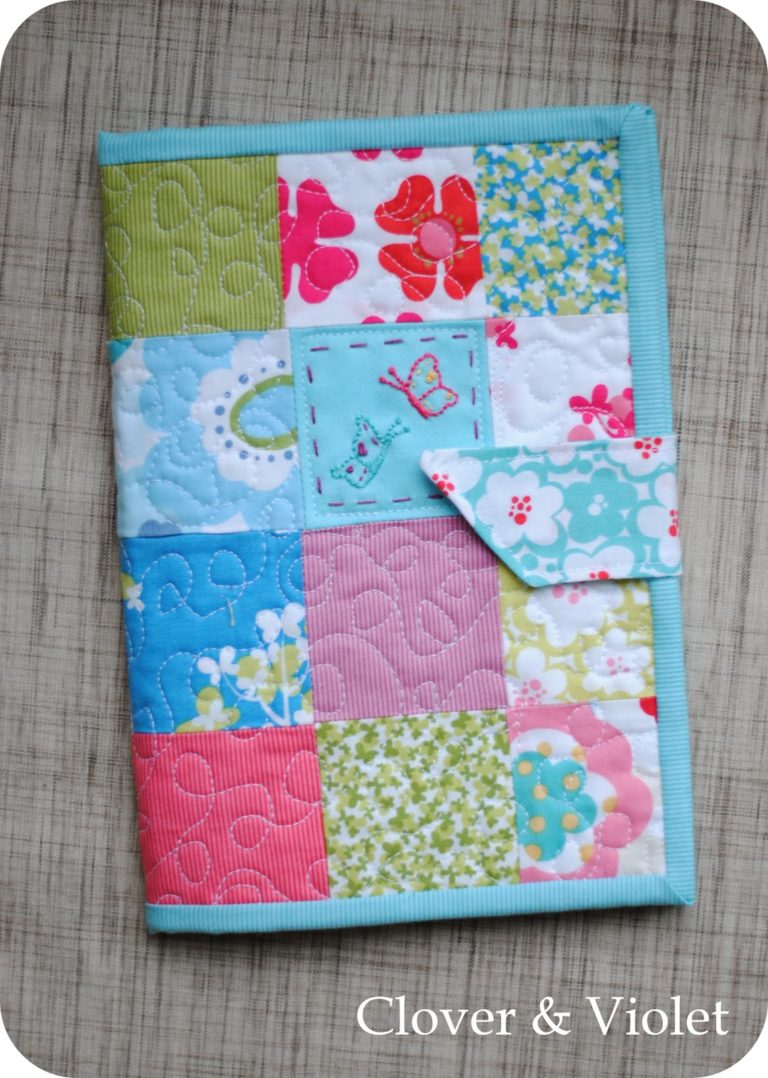
I have two little kids, both born in the winter. With my little boy, I quickly discovered how easily blankets are kicked off, so I designed a little quilt that tied to the infant car seat handle. When I found out my second was a girl, I knew she needed a girly version for the car seat too! This little quilt also works great for a stroller and can be a little play mat as well!
Supplies to make the Car Seat Quilt:
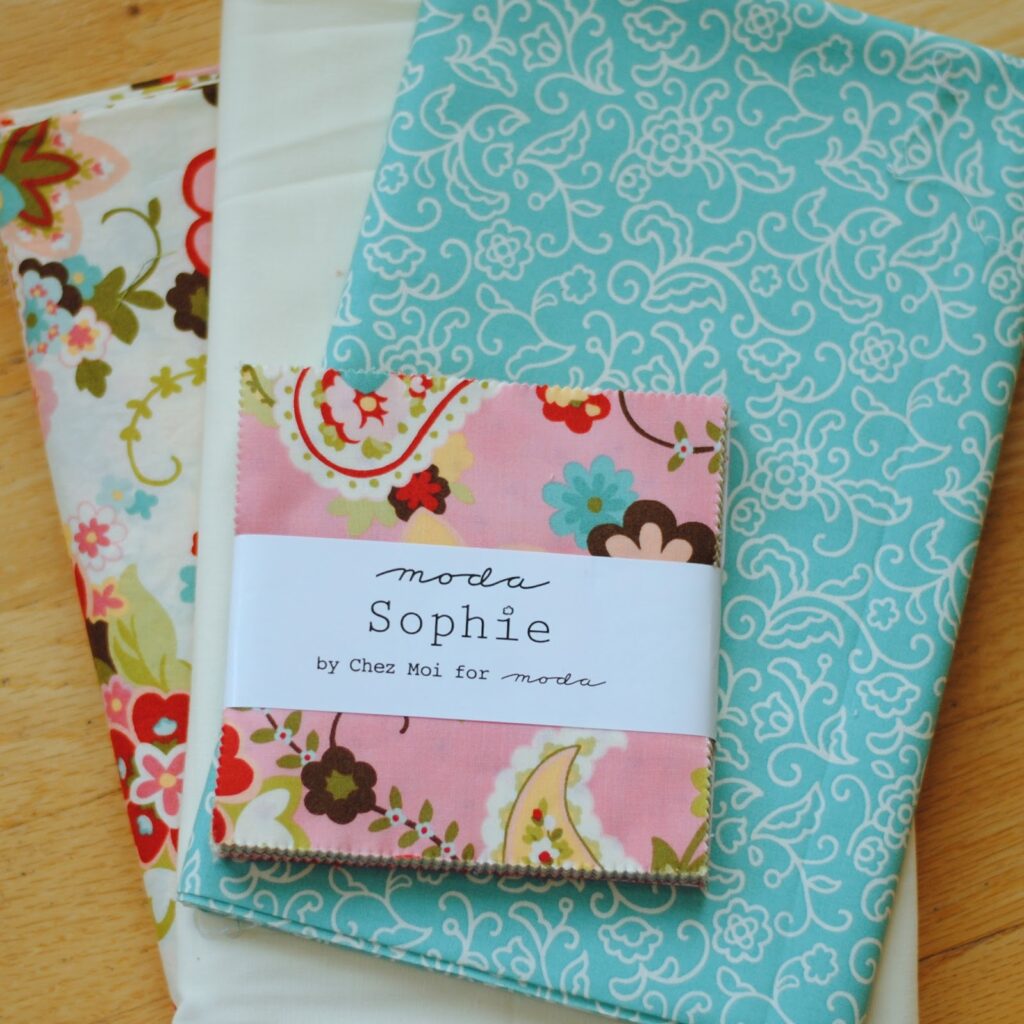
1 Charm Pack
1 yard large print for backing and binding
1/4 yard small print for borders
1/2 yard Bella Solids Snow for sashing
1 yard cotton flannel or batting
How to Make the Quilt:
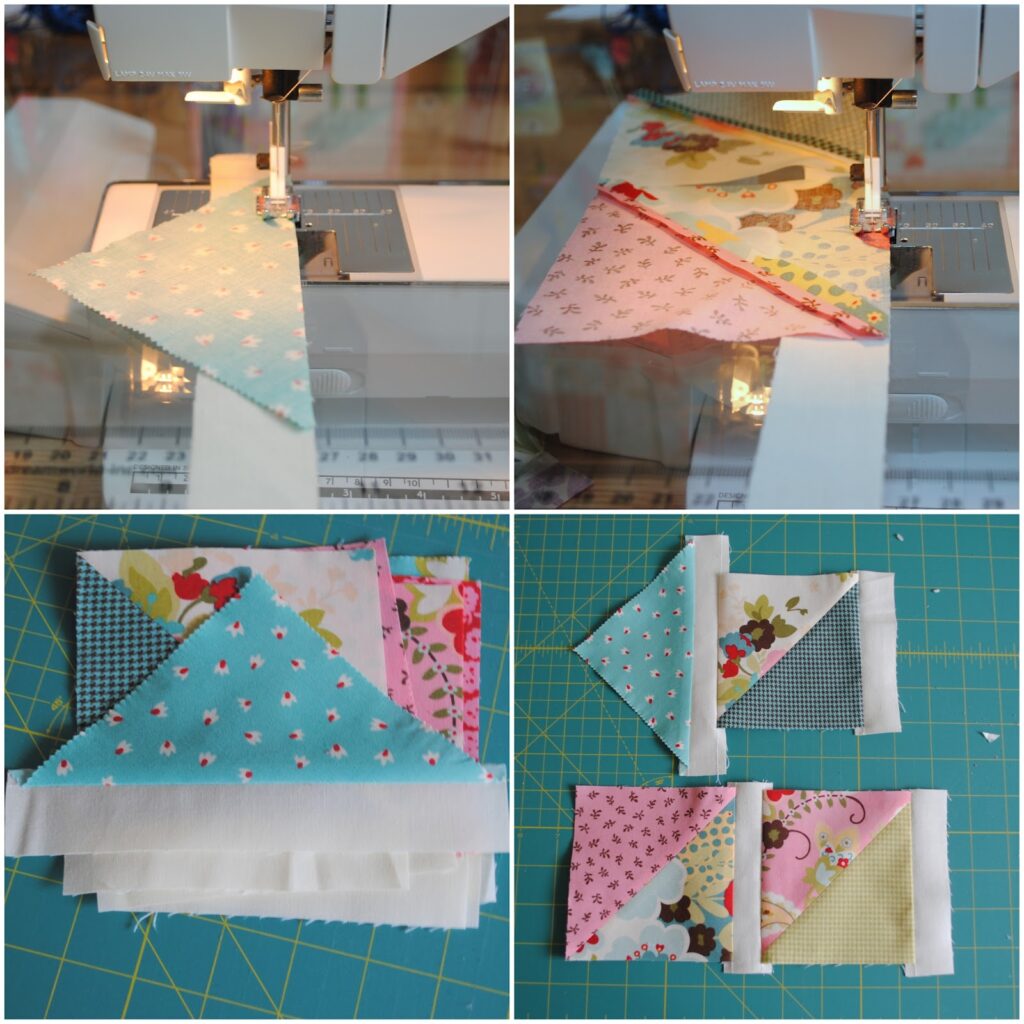
First, select 18 charm squares and pair them up for 9 pairs. Then, choose 7 more charms for the setting triangles, cut them in half diagonally, from point to point, and set aside.
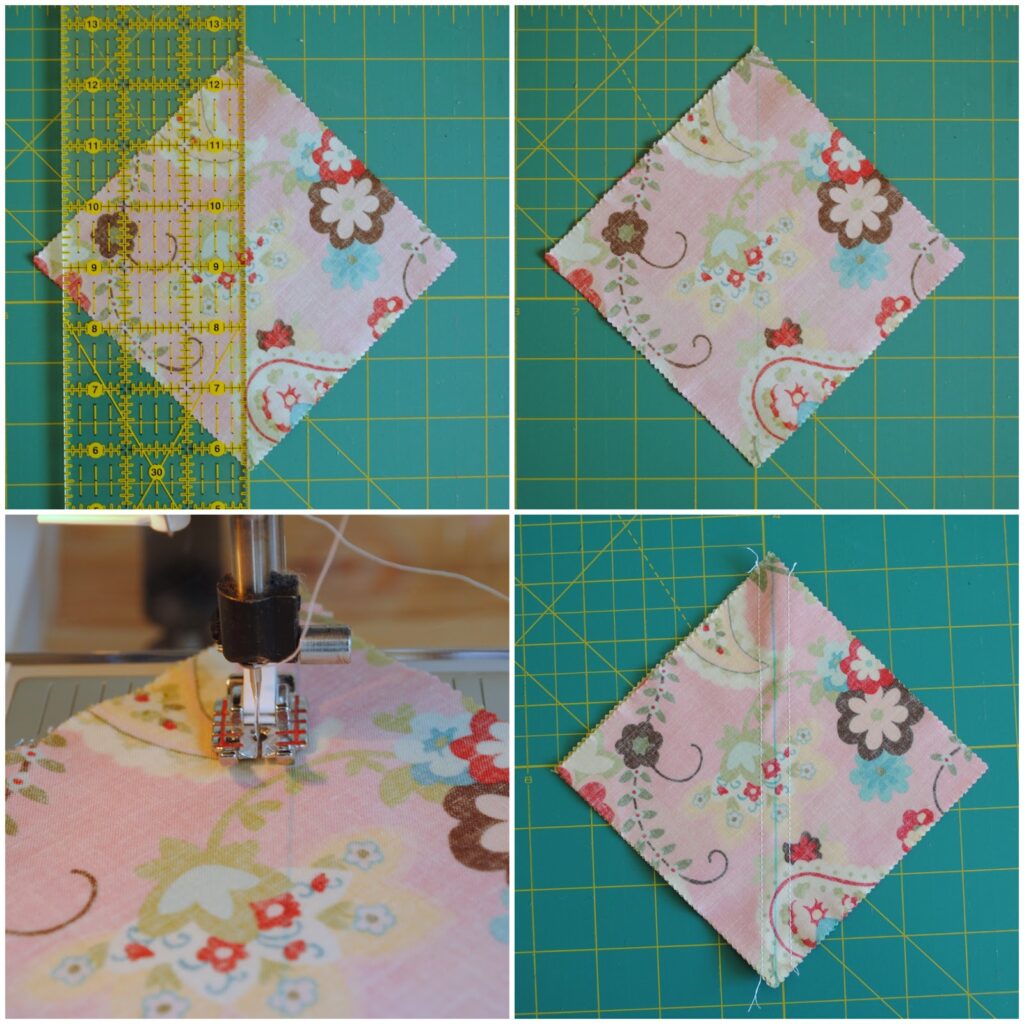
Place the pairs right sides together, then draw a line a line on the wrong side of one of the charms from point to point. Stitch through both charms 1/4 inch from the centerline on both sides of the line.
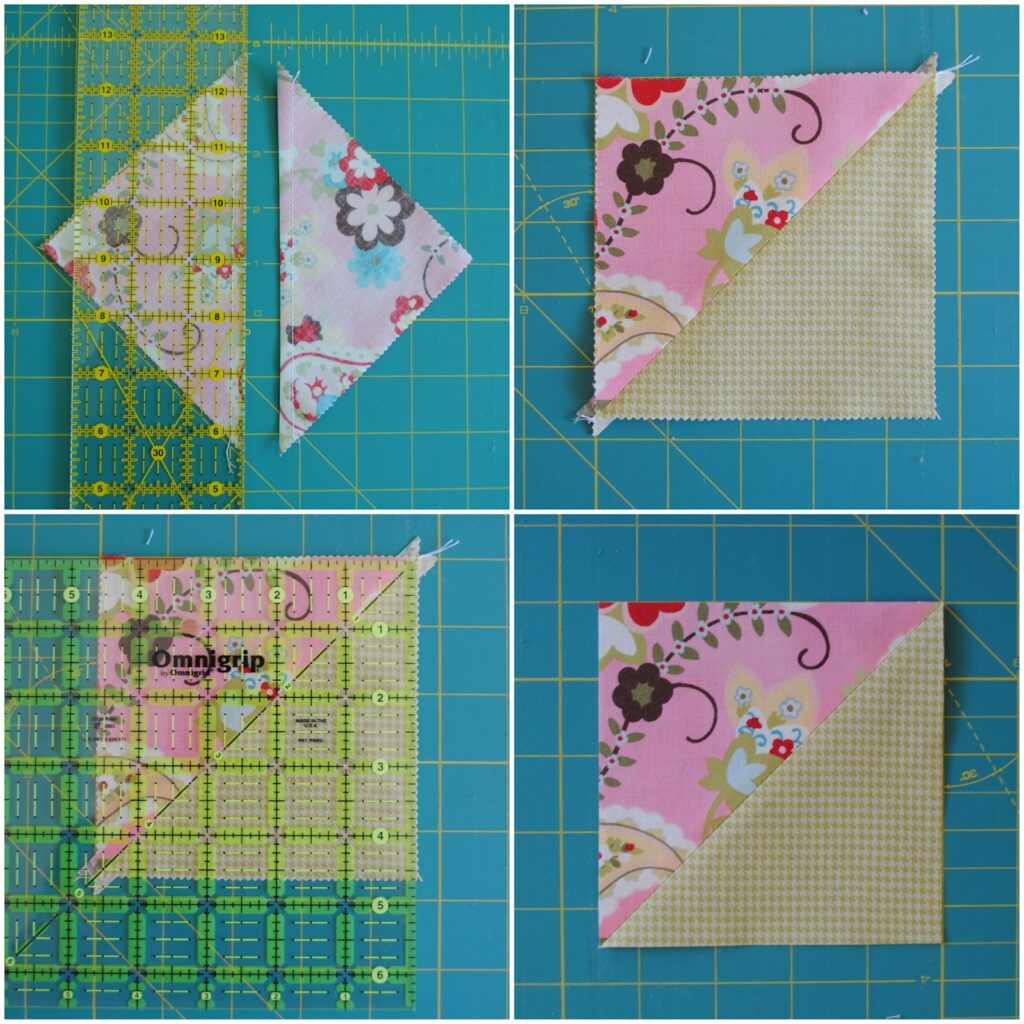
Cut the pair of charms in half along the drawn line. Press the halves open to make two half-square-triangle pairs. Trim each new square to 4 1/2″.
Once you have sewn all 18 pairs and have 18 new squares, arrange the squares and setting triangles into rows, as shown:
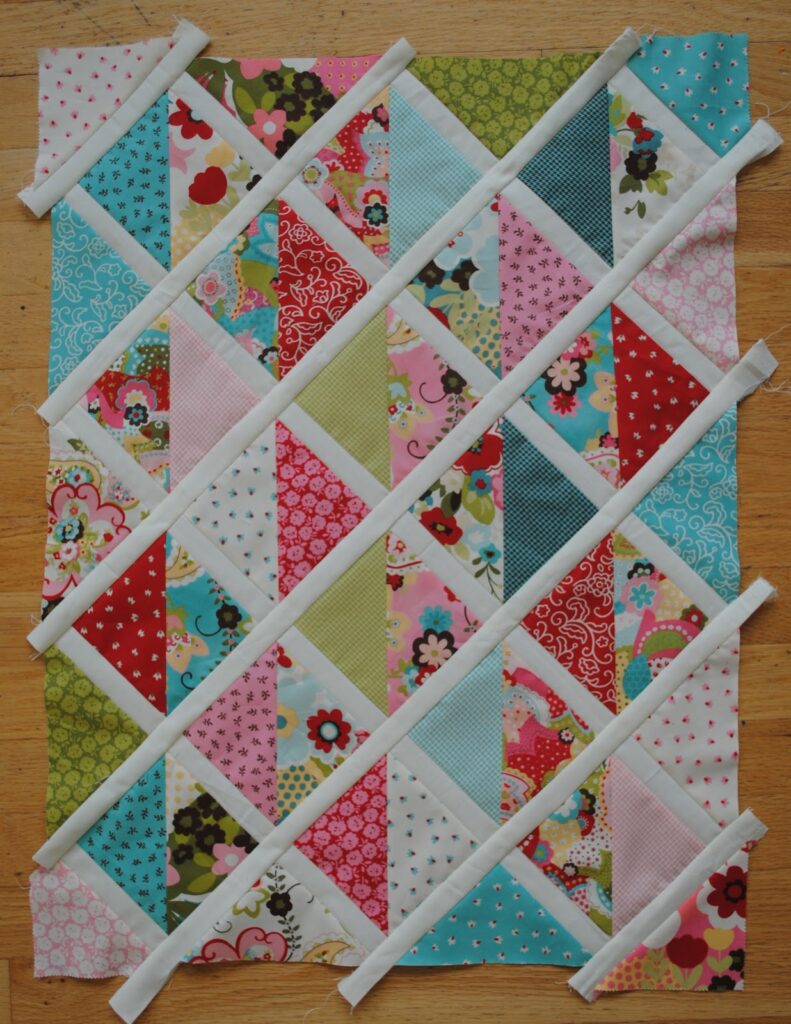
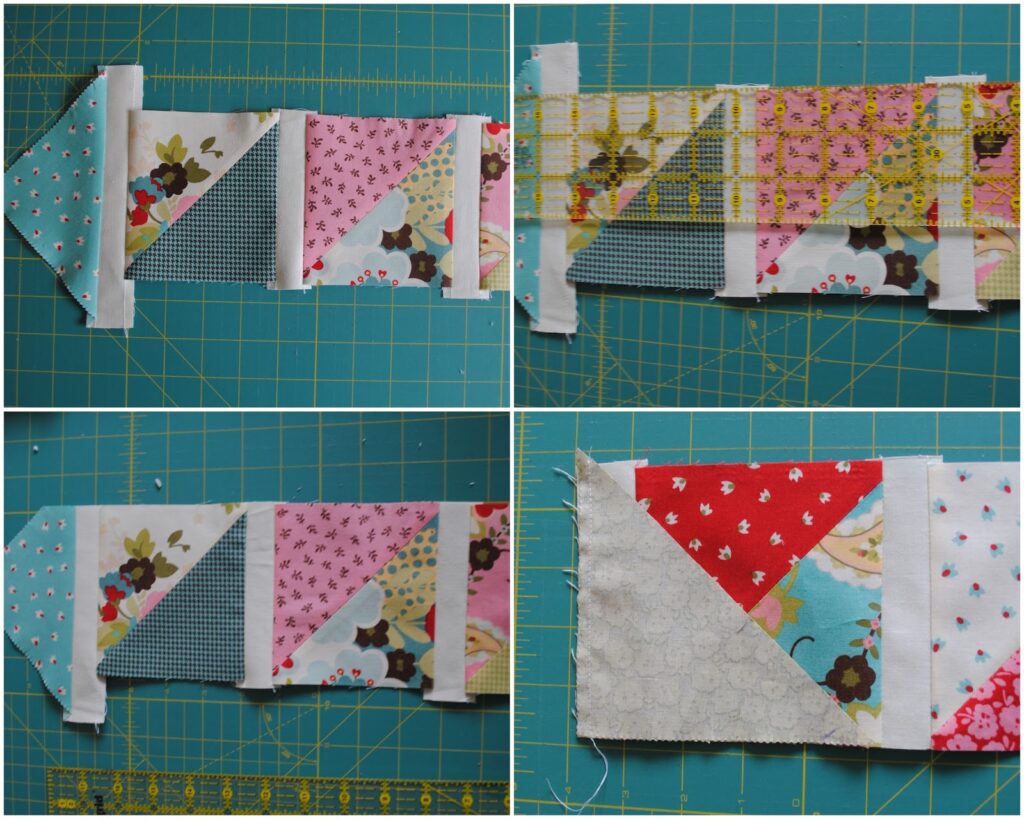
From the Bella Snow, cut ten {10} 1 1/2″ strips. Leave behind the very last triangle of each row and sew the remaining pieces onto about four {4} of the sashing strips. Cut the blocks from the strips and begin forming quilt rows as shown:
I like to leave a little bit of the sashing hanging past the blocks so that I can trim it after I’ve sewn the rows, this gives a nice straight finish. Then sew the remaining triangle onto the end of the row.
After completing the rows, begin sewing the rows onto about three {3} remaining sashing pieces. In order to line up the short sashing rows, I fold the top half-square-triangle row in half, line up the short sashings and pin at the intersections. This creates a nice grid.
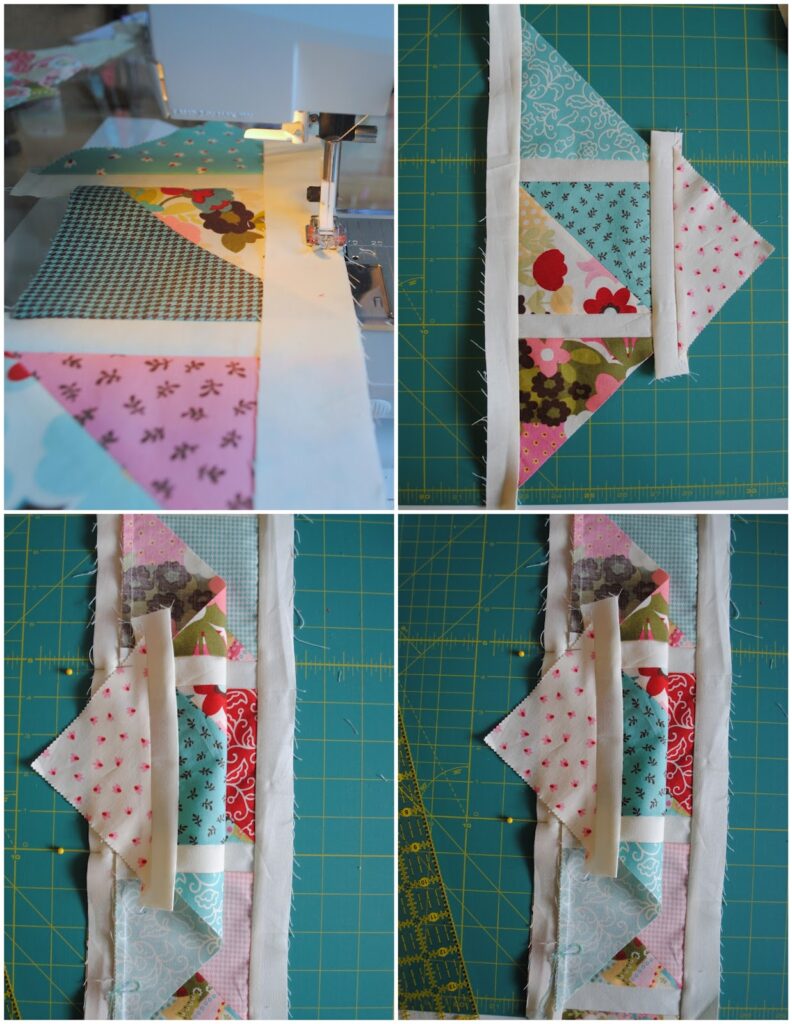
Once you’ve completed sewing all your rows together, trim the quilt. To get nice, accurate points, trim 1/4″ past each of the points, always lining up at least two points while you’re trimming.

Use the remaining sashing pieces to create a border around the quilt. Then, from the small border print, cut four {4} 2″ strips. Sew the border on in the same manner as the sashing.

Layer using your favorite batting. I used prewashed cotton flannel in my little quilt because where we live a heavy quilt isn’t necessary. This is a great option for a warm climate or a spring or fall baby, when a little warmth is needed, but not as much as a full quilt. I quilted with an allover meander. Because my quilt was lightweight, I also used a single fold binding method.

Instead of using a 2 1/2″ piece of binding folded in half {as for a standard double fold binding}, use a 1 1/2″ piece not folded. Then pull it flat, tuck the raw edge in, and wrap it around to the back. I always pin or clip my binding down when using a single fold to avoid excess fraying.
Now, the final touch to this little quilt is adding the ties. Cut two 1 1/2″ x 28″ strips {I cut mine from the remaining backing piece}. Fold in half, press, then fold both raw edges toward the center seam as for bias binding.

Pin one ties ten inches {10″} from the top of the quilt on each side. Stitch in place and your quilt is ready for outings!
Finished Quilt:

One 25″ x 30″ quilt, ready to be tied on to any car seat or stroller!
Oh, and hopefully one cozy warm {and stylish} baby too!
I hope you enjoy this design, and if you make it, I’d love for you to share it on Instagram! Tag me @cloverandviolet and #cloverandvioletpatterns #sophiecarseatquilt
Get a Printable PDF of the Tutorial
The Sophie Car Seat Quilt is small in size but features ties to keep it from being kicked off or blown away while keeping your little one cozy. The quilt can be tied onto most car seat handles or stroller sides.
So cute! Thank you, have two to make!
Can you tell me what a charm pack is and how do I get one?
A charm pack is 42 precut 5” squares prepackaged to coordinate. Many quilt shops sell them, usually for around $10-15. An internet search should yield a variety of results! Hope that helps!
Hooray! I saw this on Pinterest and so wanted to make one for a gift! Thank you so much for such a wonderful share!
Hi Jennie, thank you for this tutorial, I was able to do a car seat quilt for my niece, following your instructions and it turned out so nice. It´s a wonderful and very useful gift for a baby. I wouldn´t say it´s a beginner friendly project, but I very much enjoyed doing it. Have a nice week end.
I am looking forward to making this for my newest grand-daughter, born just 2 days ago! It is my very first project of this type and I am somewhat confused by the sashing strips and the order of sewing. Can you clarify- am I cutting the strips into pieces the size of the squares and building each row, then connecting to the larger strips? Thanks for any help you can give!
Are there instructions to make the Sophie car seat cover with larger blocks…would like to make it a bit larger and use to throw across couch or chair
This is an excellent tutorial. Thank you. It is for my very first grandchild and matches the cot quilt already made for them. Due at the end of August so that makes it a Winter baby – here in South Australia! Which means they need lots of snuggling up from the cold weather.